Proxmox Backup Server on Raspberry Pi
This is my second post in a series of blog posts (in no particular order) to build my homelab. These posts and this homelab will be a living being connected to myself. As I grow and learn more about system administration and networking, so will the homelab.
Today’s post will document how to deploy Proxmox Backup Server as a Docker container on the Raspberry Pi. If you haven’t seen my previous post on configuring the Raspberry Pi, check that out first. This post assumes that your setup has Docker enabled along with an externally attached storage device.
Proxmox Backup Server
Proxmox Backup Server (PBS) is an enterprise backup solution for backing up and restoring VMs, containers, and physical hosts 1. Through the process of decomissioning my old Proxmox server, I wanted to back up the VMs before setting up the new server where I can then restore them.
In this post, I will also demonstrate how to restore a VM from the PBS to a Proxmox server but I will document the process of building a Proxmox server from scratch in a future post.
Docker Container
PBS was not originally designed to run on ARM architecture but a brilliant developer created a Docker container that bypasses this limitation and pushed it to GitHub. Only a few changes are needed to be made to make this work on our system.
Your Pi OS must be 64-bit for this to work.
Clone the repository from https://github.com/ayufan/pve-backup-server-dockerfiles to pull the necessary files to build from scratch.
I switched into the root user to save the directory in /opt.
robinder@pi:/opt $ sudo su
root@pi:/opt# git clone https://github.com/ayufan/pve-backup-server-dockerfiles.git pbs
Cloning into 'pbs'...
remote: Enumerating objects: 541, done.
remote: Compressing objects: 100% (29/29), done.
remote: Total 541 (delta 29), reused 40 (delta 25), pack-reused 487
Receiving objects: 100% (541/541), 100.97 KiB | 1.05 MiB/s, done.
Resolving deltas: 100% (303/303), done.
root@pi:/opt# ls -l pbs
total 52
drwxr-xr-x  2 root root 4096 Nov 11 21:54 dev-scripts
-rw-r--r--  1 root root  469 Nov 11 21:54 docker-compose.yml
-rw-r--r--  1 root root 2661 Nov 11 21:54 Dockerfile
-rw-r--r--  1 root root 1112 Nov 11 21:54 Dockerfile.client
-rw-r--r--  1 root root 4465 Nov 11 21:54 Makefile
drwxr-xr-x  2 root root 4096 Nov 11 21:54 pbs
-rw-r--r--  1 root root 5026 Nov 11 21:54 README.md
-rw-r--r--  1 root root  154 Nov 11 21:54 RELEASE.md
drwxr-xr-x  4 root root 4096 Nov 11 21:54 runit
drwxr-xr-x  3 root root 4096 Nov 11 21:54 scripts
drwxr-xr-x 11 root root 4096 Nov 11 21:54 versions
Viewing the contents of the docker-compose.yml file
root@pi:/opt/pbs# cat docker-compose.yml
version: '2.1'

services:
  pbs:
    image: ayufan/proxmox-backup-server:latest
    network_mode: host
    mem_limit: 2G
    volumes:
      - pbs_etc:/etc/proxmox-backup
      - pbs_logs:/var/log/proxmox-backup
      - pbs_lib:/var/lib/proxmox-backup
    tmpfs:
      - /run
    cap_add: # smartctl support
      - SYS_RAWIO
    devices:
      - /dev/sda
      - /dev/sdb
    restart: unless-stopped
    stop_signal: SIGHUP

volumes:
  pbs_etc:
  pbs_logs:
  pbs_lib:
A few changes are going to be made to this docker-compose file. First, changing the restart option to be always so that even if I manually stop the daemon, the container will restart. Second, I will use the volumes from my mounted storaged device so that the backups and proxmox related files are written to that device.
Outputting the contents of the updated docker-compose file
robinder@pi:~/Documents/pve-backup-server-dockerfiles $ cat docker-compose.yml
version: '2.1'

services:
  pbs:
    image: ayufan/proxmox-backup-server:latest
    network_mode: host
    mem_limit: 2G
    volumes:
      - pbs_etc:/etc/proxmox-backup
      - pbs_logs:/var/log/proxmox-backup
      - pbs_lib:/var/lib/proxmox-backup
      - pbs_backups:/backups
    tmpfs:
      - /run
    cap_add: # smartctl support
      - SYS_RAWIO
    devices:
      - /dev/sda
    restart: unless-stopped
    stop_signal: SIGHUP

volumes:
  pbs_etc:
    driver: local
    driver_opts:
      type: ''
      o: bind
      device: /mnt/externalhdd/pbs/etc
  pbs_logs:
    driver: local
    driver_opts:
      type: ''
      o: bind
      device: /mnt/externalhdd/pbs/logs
  pbs_lib:
    driver: local
    driver_opts:
      type: ''
      o: bind
      device: /mnt/externalhdd/pbs/lib
  pbs_backups:
    driver: local
    driver_opts:
      type: ''
      o: bind
      device: /mnt/externalhdd/pbs/backups
This Docker container mounts four directories to the host filesystem in the current directory. I specified four volumes at the bottom of the docker-compose that are referenced in the pbs service section.
volumes:
      - pbs_etc:/etc/proxmox-backup
      - pbs_logs:/var/log/proxmox-backup
      - pbs_lib:/var/lib/proxmox-backup
      - pbs_backups:/backups
Each entry in the volumes section specifies a volume and the directory that it is mapped to in the Docker container. In the volume section,
volumes:
  pbs_etc:
    driver: local
    driver_opts:
      type: ''
      o: bind
      device: /mnt/externalhdd/pbs/etc
I specify the volume name and the location on the host filesystem.
The advantage is that the data will persist between reboots and container rebuilds. If the Pi were to be wiped for any reason, a rebuild of the Pi with the same docker-compose setup will not result in any lost data related to the VM backups.
With the docker-compose file modified to your use case, execute the docker compose up command.
root@pi:/opt/pbs# docker compose up -d
[+] Running 6/6
 ⠿ pbs Pulled                                                                                                                          67.2s
   ⠿ 39ab78bc09e7 Pull complete                                                                                                        32.2s
   ⠿ a9c48d67eda0 Pull complete                                                                                                        36.3s
   ⠿ 61430e9fe25f Pull complete                                                                                                        64.9s
   ⠿ 462338cc4307 Pull complete                                                                                                        65.1s
   ⠿ b7127d934af2 Pull complete                                                                                                        65.3s
[+] Running 5/5
 ⠿ Volume "pbs_pbs_logs"     Created                                                                                                    0.0s
 ⠿ Volume "pbs_pbs_lib"      Created                                                                                                    0.0s
 ⠿ Volume "pbs_pbs_backups"  Created                                                                                                    0.0s
 ⠿ Volume "pbs_pbs_etc"      Created                                                                                                    0.0s
 ⠿ Container pbs-pbs-1       Started
Checking the status of the container
root@pi:/opt/pbs# docker ps -a
CONTAINER ID   IMAGE                                 COMMAND             CREATED          STATUS         PORTS     NAMES
e64b1eac6030   ayufan/proxmox-backup-server:latest   "runsvdir /runit"   10 seconds ago   Up 3 seconds             pbs-pbs-1
View the netstat output to view all listening ports related to the proxmox-backup docker container
root@pi:/opt/pbs# ss -tulnp | grep proxmox-backup
udp   UNCONN 0      0          127.0.0.1:40336      0.0.0.0:*    users:(("proxmox-backup-",pid=1899,fd=13))
udp   UNCONN 0      0          127.0.0.1:44442      0.0.0.0:*    users:(("proxmox-backup-",pid=1898,fd=13))
tcp   LISTEN 0      1024       127.0.0.1:82         0.0.0.0:*    users:(("proxmox-backup-",pid=1898,fd=18),("proxmox-backup-",pid=1898,fd=17))
tcp   LISTEN 0      1024               *:8007             *:*    users:(("proxmox-backup-",pid=1899,fd=20),("proxmox-backup-",pid=1899,fd=19))
The docker-compose file specified host networking which exposes all listening services at the host level without requiring us so specify a host to container port mapping.
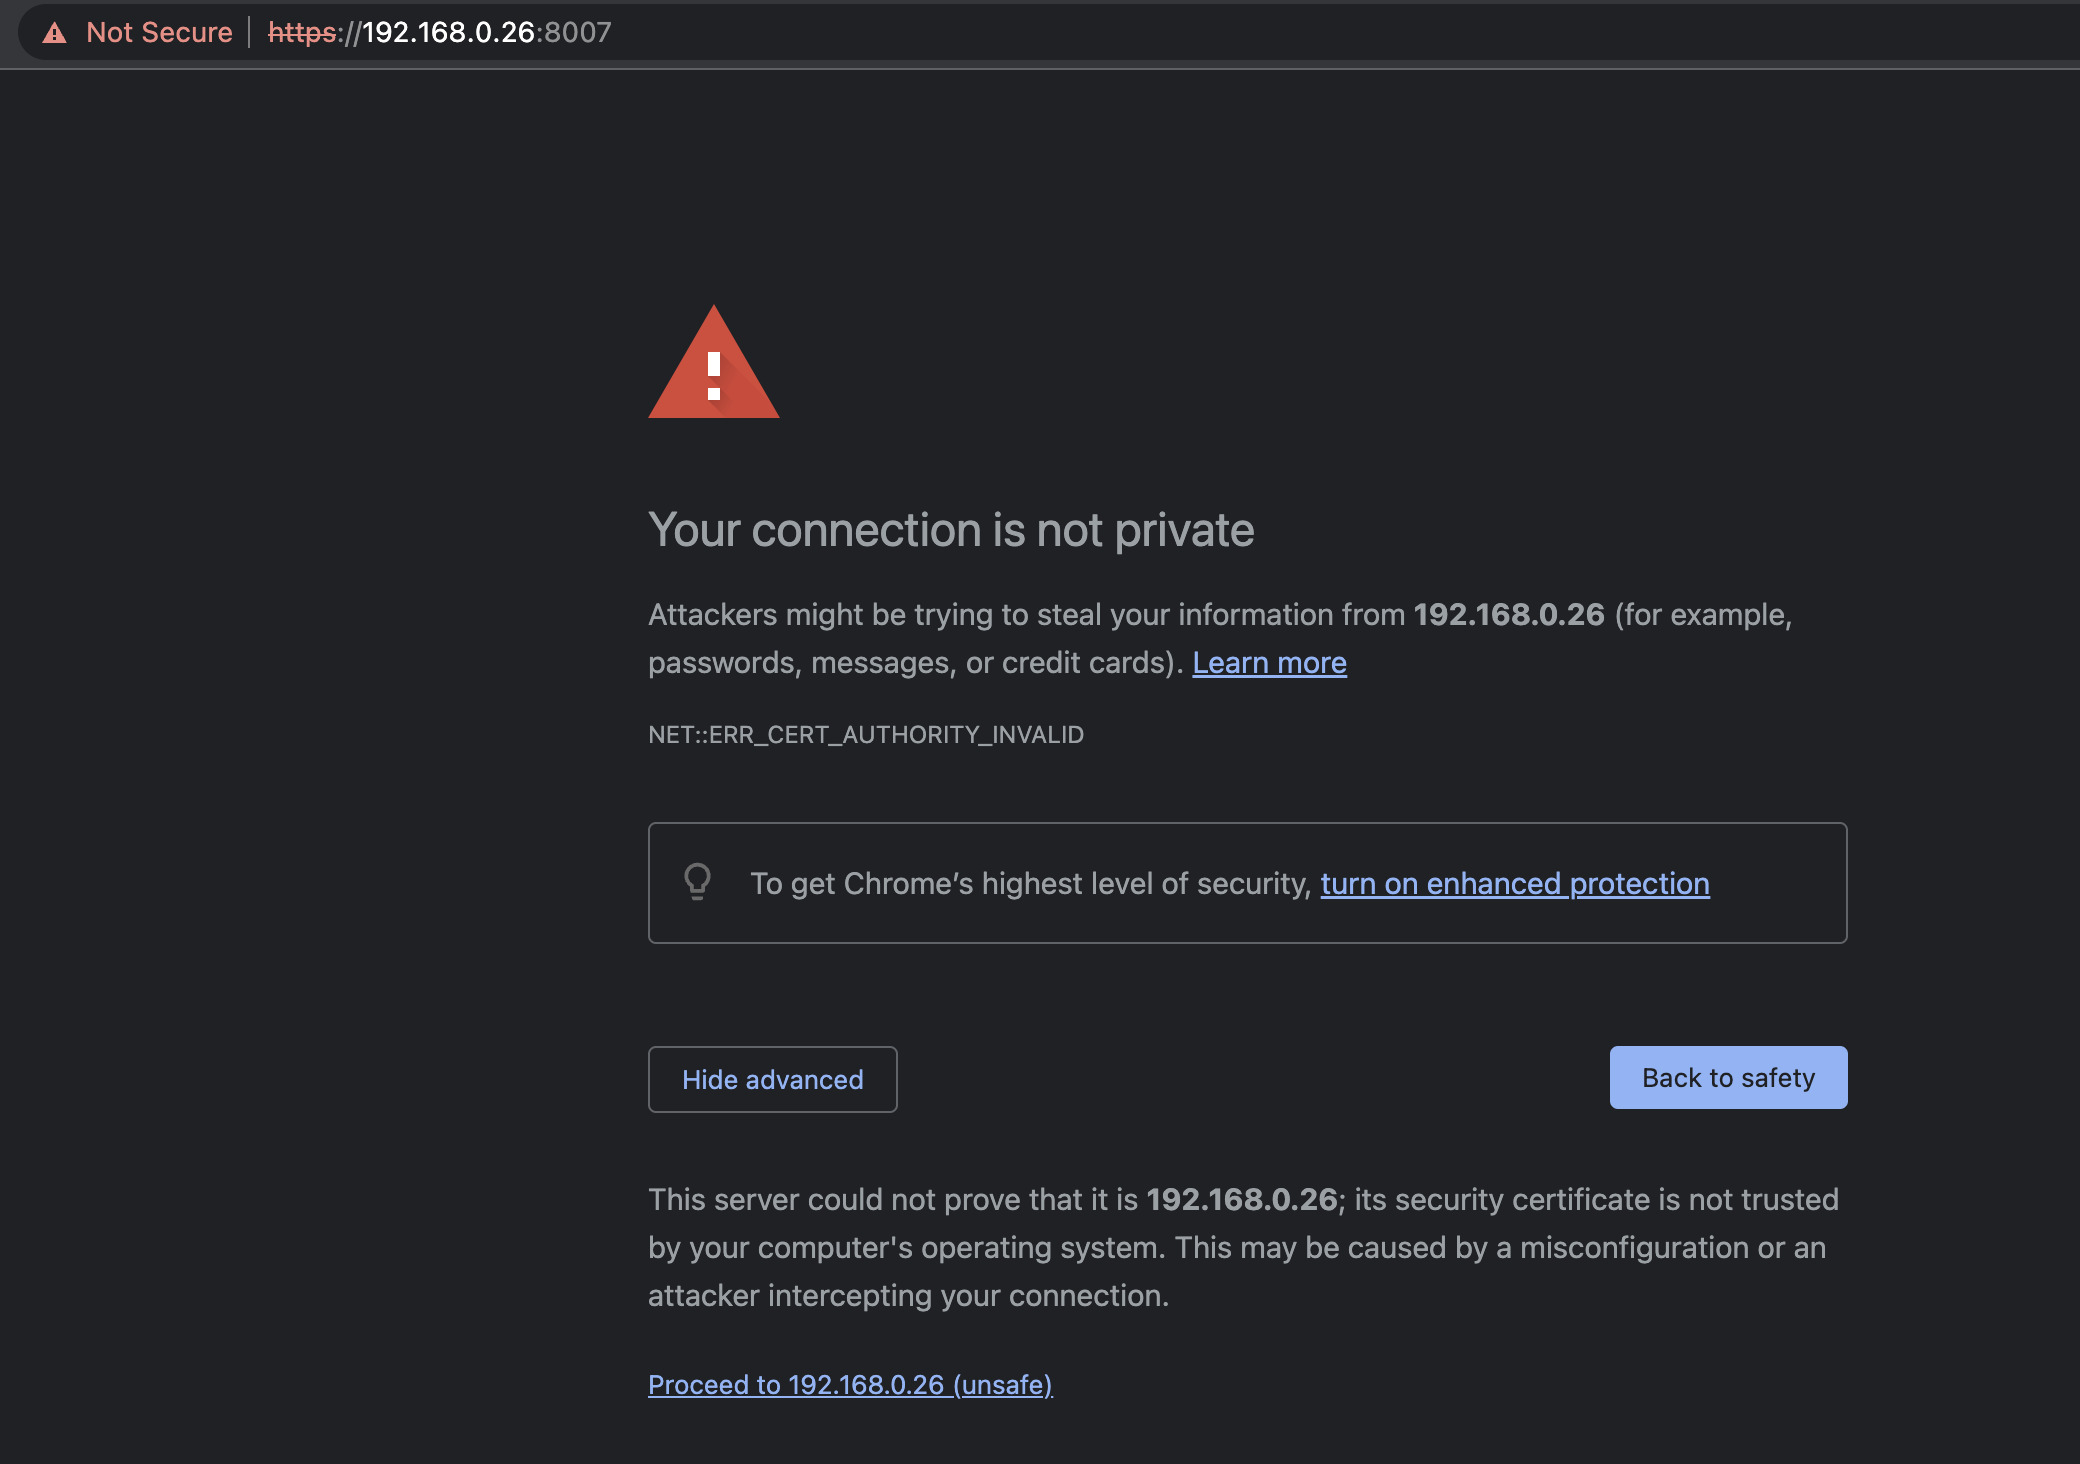
The UI for PBS is listening on port 8007 on all interfaces. Browse to https://<pi ip>:8007. Accept the self-signed certificate warning.
When prompted with the authentication form, use the credentials admin:pbspbs.
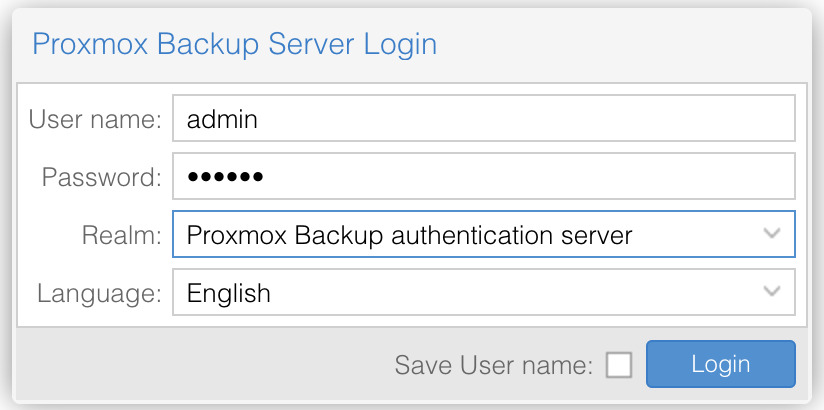
These are the credentials that the creator of the Docker container configured as part of their build. Because PBS is running inside of a container, the PAM authentication realm of the Pi will not be the same as the one of the container. Our user for the Pi does not exist in the container.
Now, your PBS instance is up and running! The next section is only valid if you have a PVE node which I will document in a future post.
Connect PBS to PVE
To add the PBS as a storage option for your VM’s on the PVE, we need to take note of the fingerprint of the Backup Server. This is required to connect a Proxmox Virtual Environment instance to the Backup Server for validation purposes.
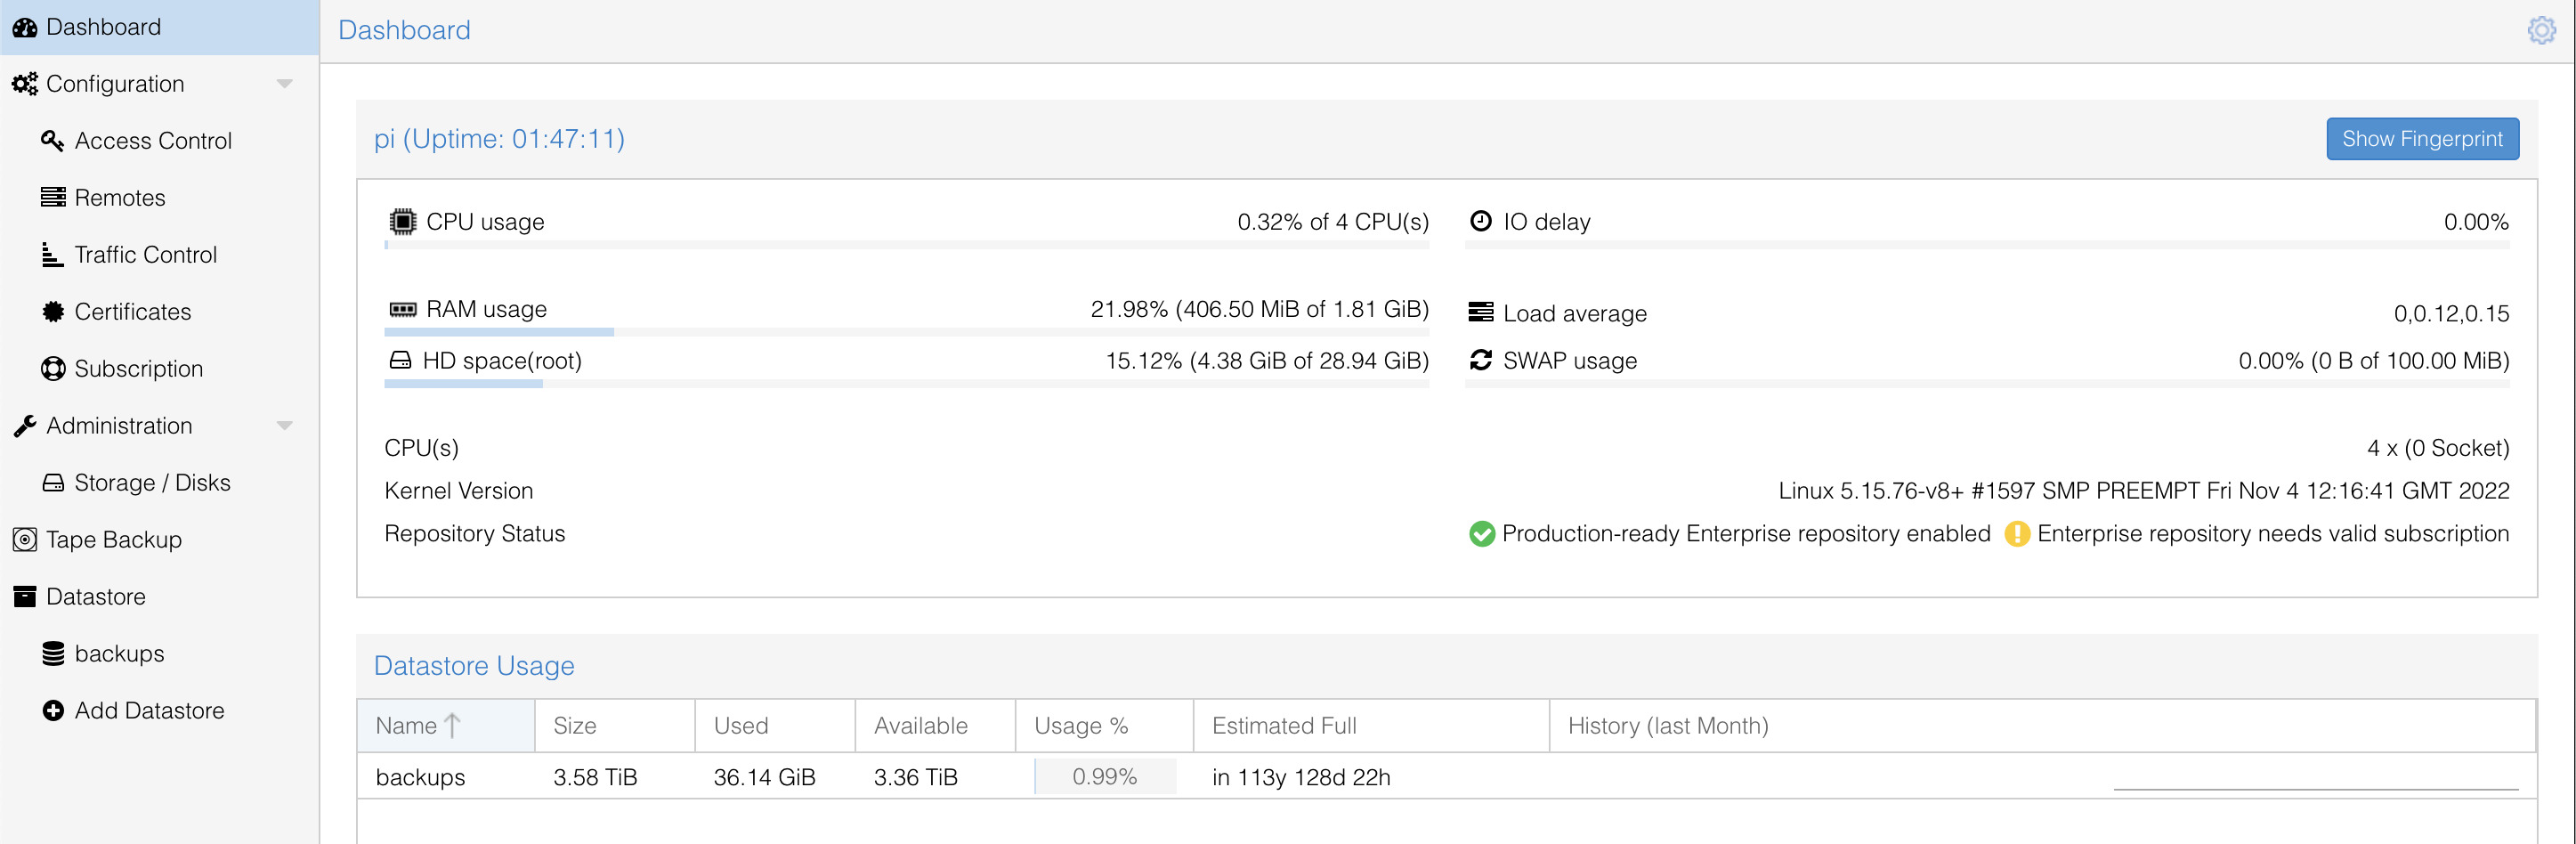
On the Dashboard section of the main PBS menu, click on the Show Fingerprint button. Copy the fingerprint and save it.
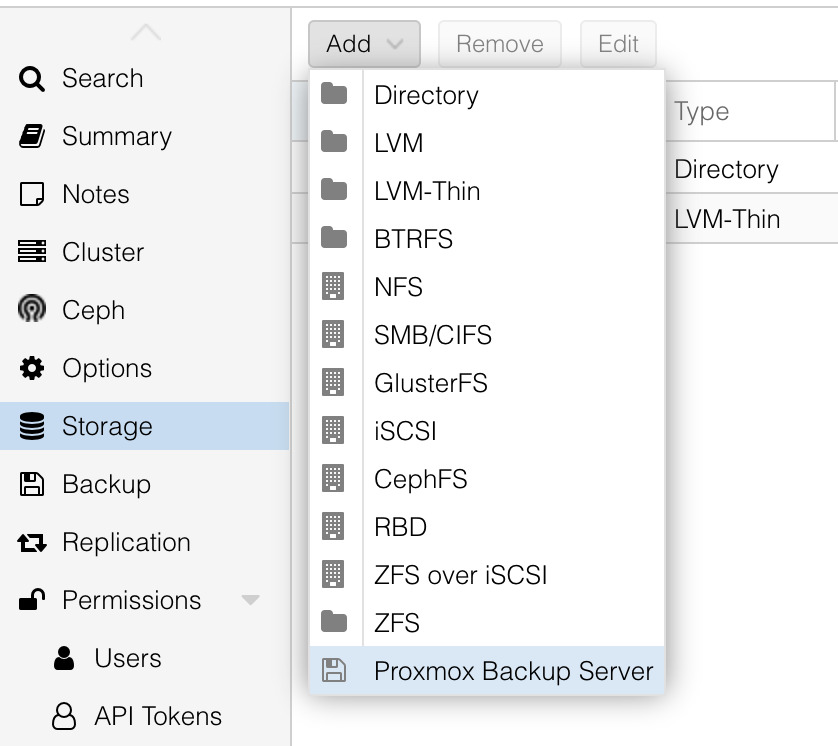
Switch to the PVE node and select the Storage option under the Datacenter section.
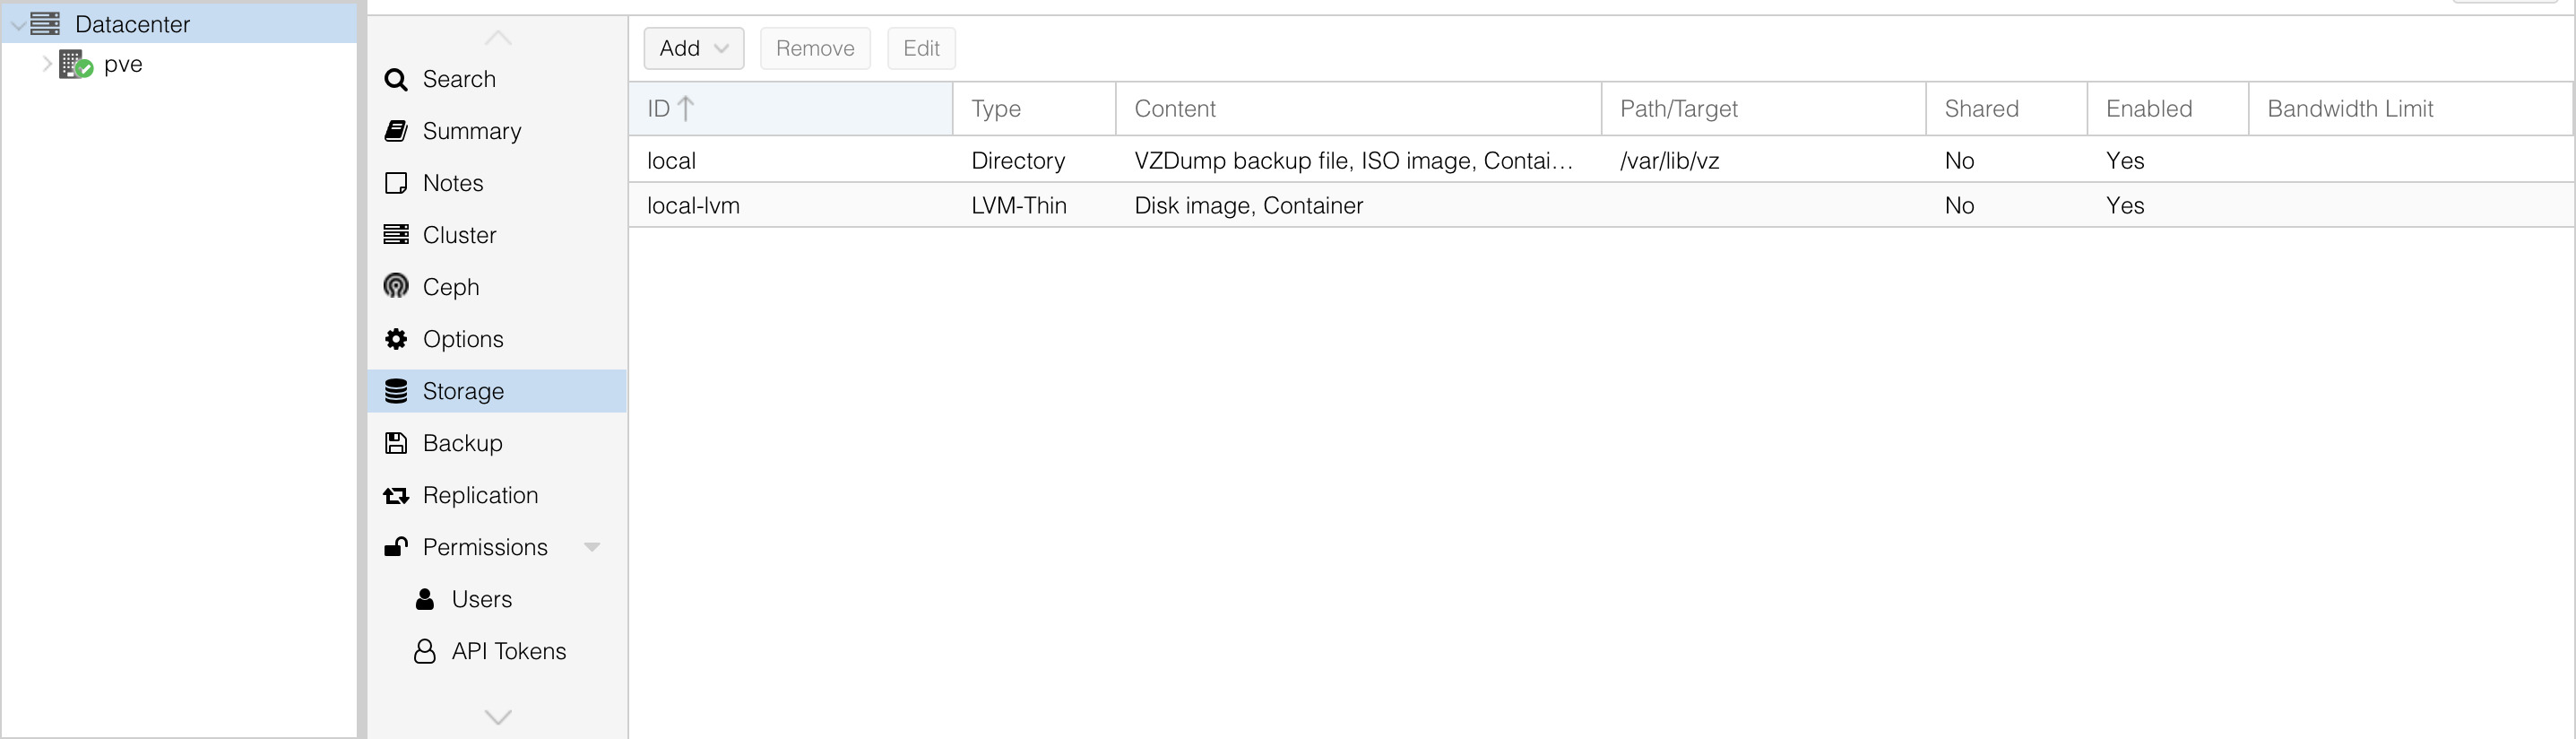
Datacenter -> Storage -> Add -> Proxmox Backup Server
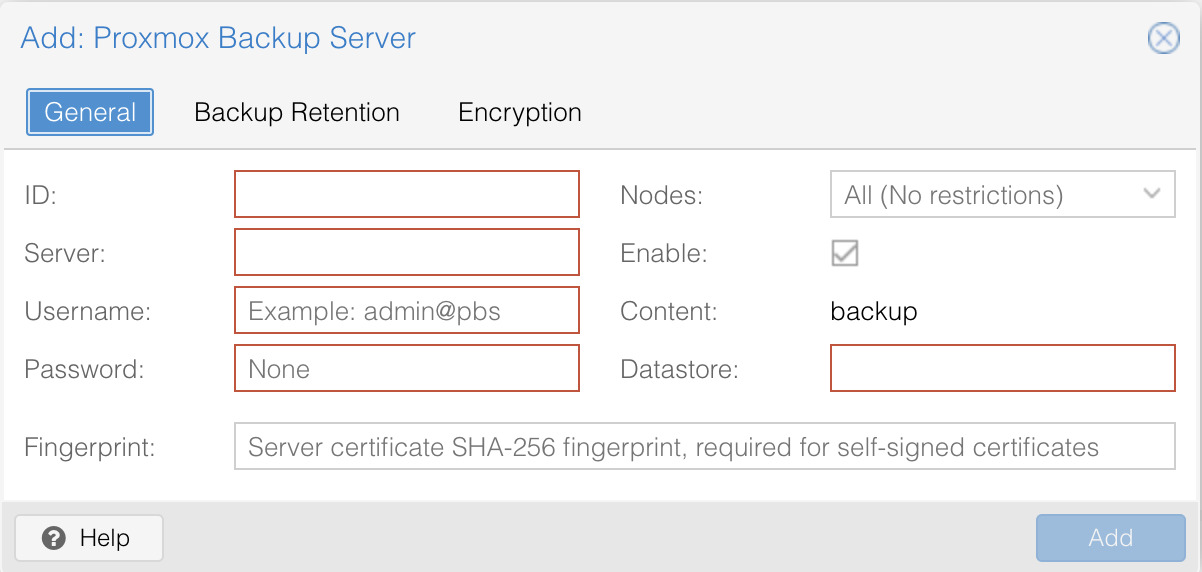
- ID: identifier for the pbs instance
- Server: IP address or hostname of the pbs
- Username: username@realm for the pbs user (if you followed the above tutorial, this is admin@pbs)
- Password: password for the user
- Fingerprint: fingerprint for the pbs
- Datastore: name of the datastore containing the backups (if you look at the PBS menu, there is a section under Datastore that displays the name of all datastores which in our case should be just one called backups)
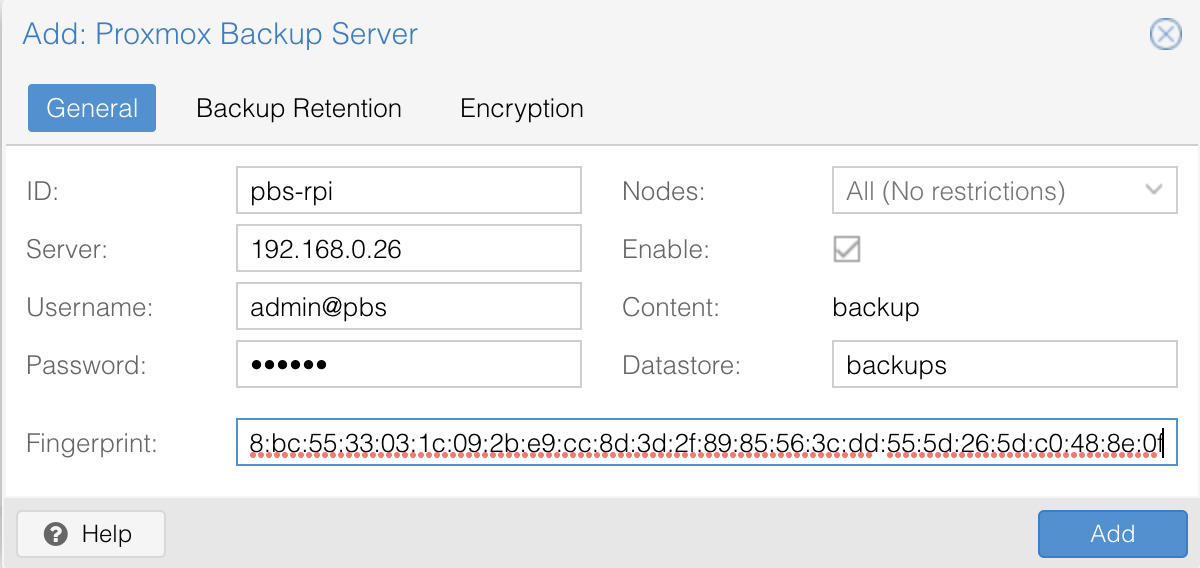
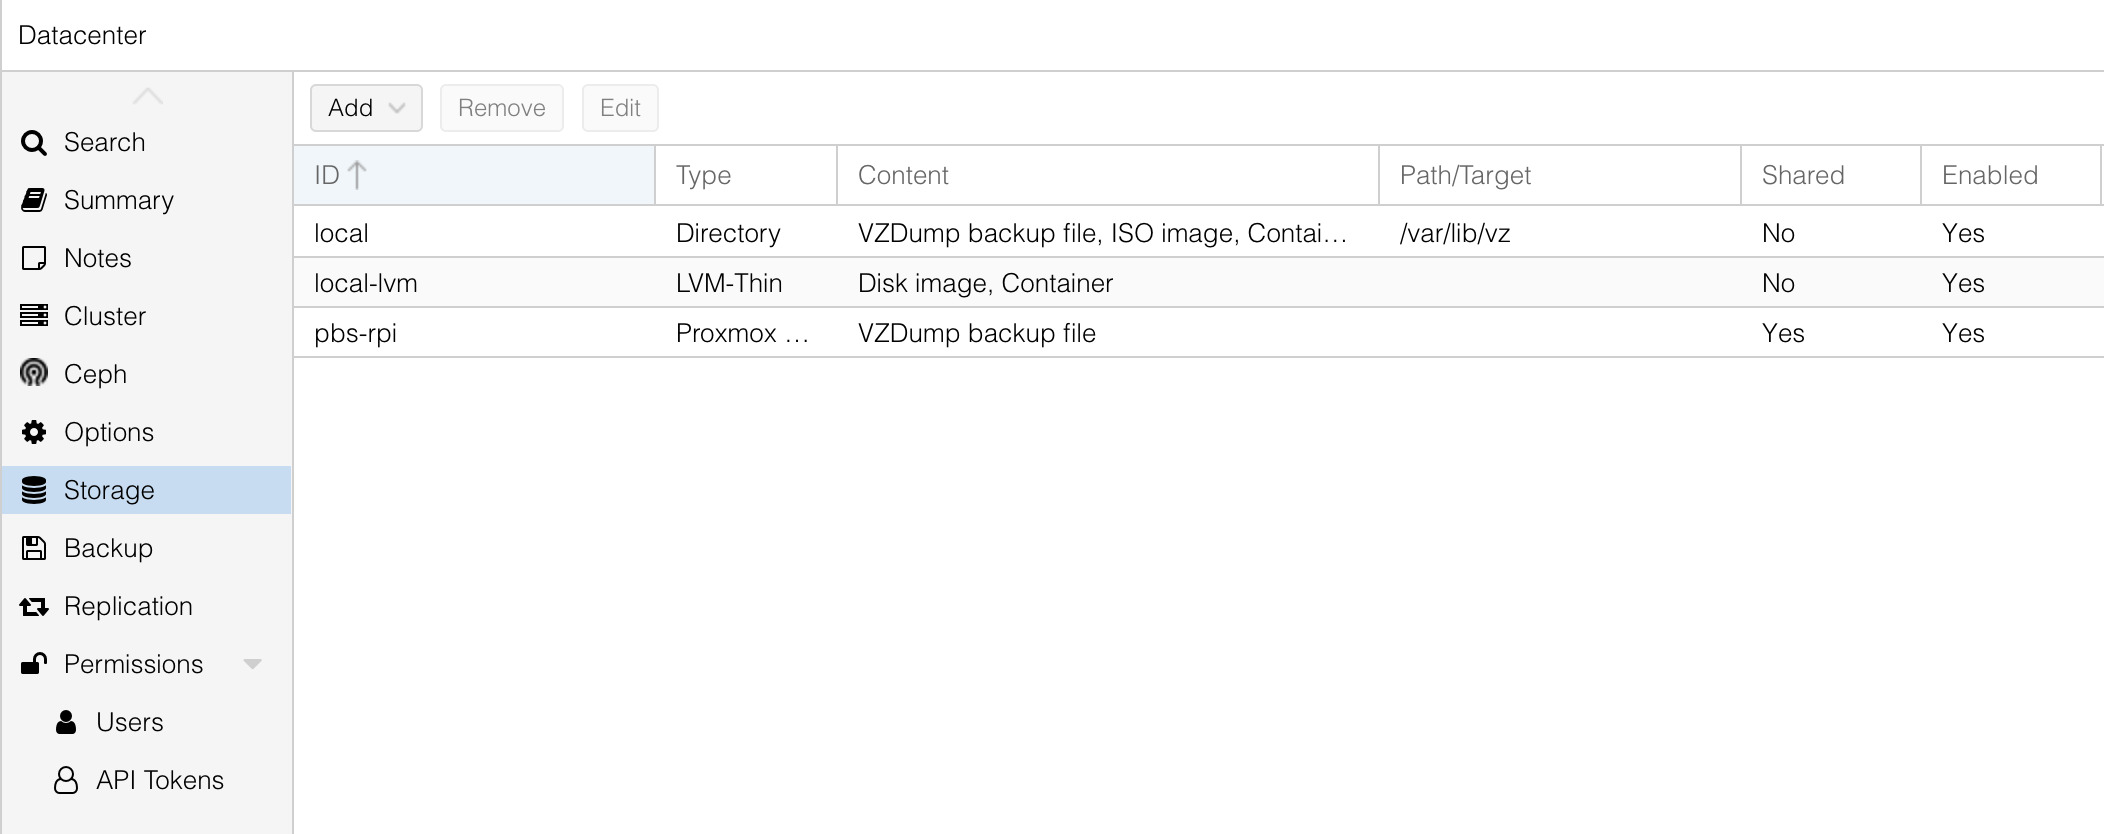
My menu with the filled in fields. Click Add and you should see the PBS instance under the storage list.
Restoring a VM
Continuing to work on the PVE node, click on Datacenter -> pve -> pbs-rpi (this is the ID you specified for the PBS instance when connecting to PVE) -> Backups, we can see the VM’s and snapshots. From my previous Proxmox server, I backed up three VM’s which unfortunately did not save the names of the VM’s, only the ID’s.

To restore a VM, click on one of the saved snapshots (vm102 in this case) and restore it.
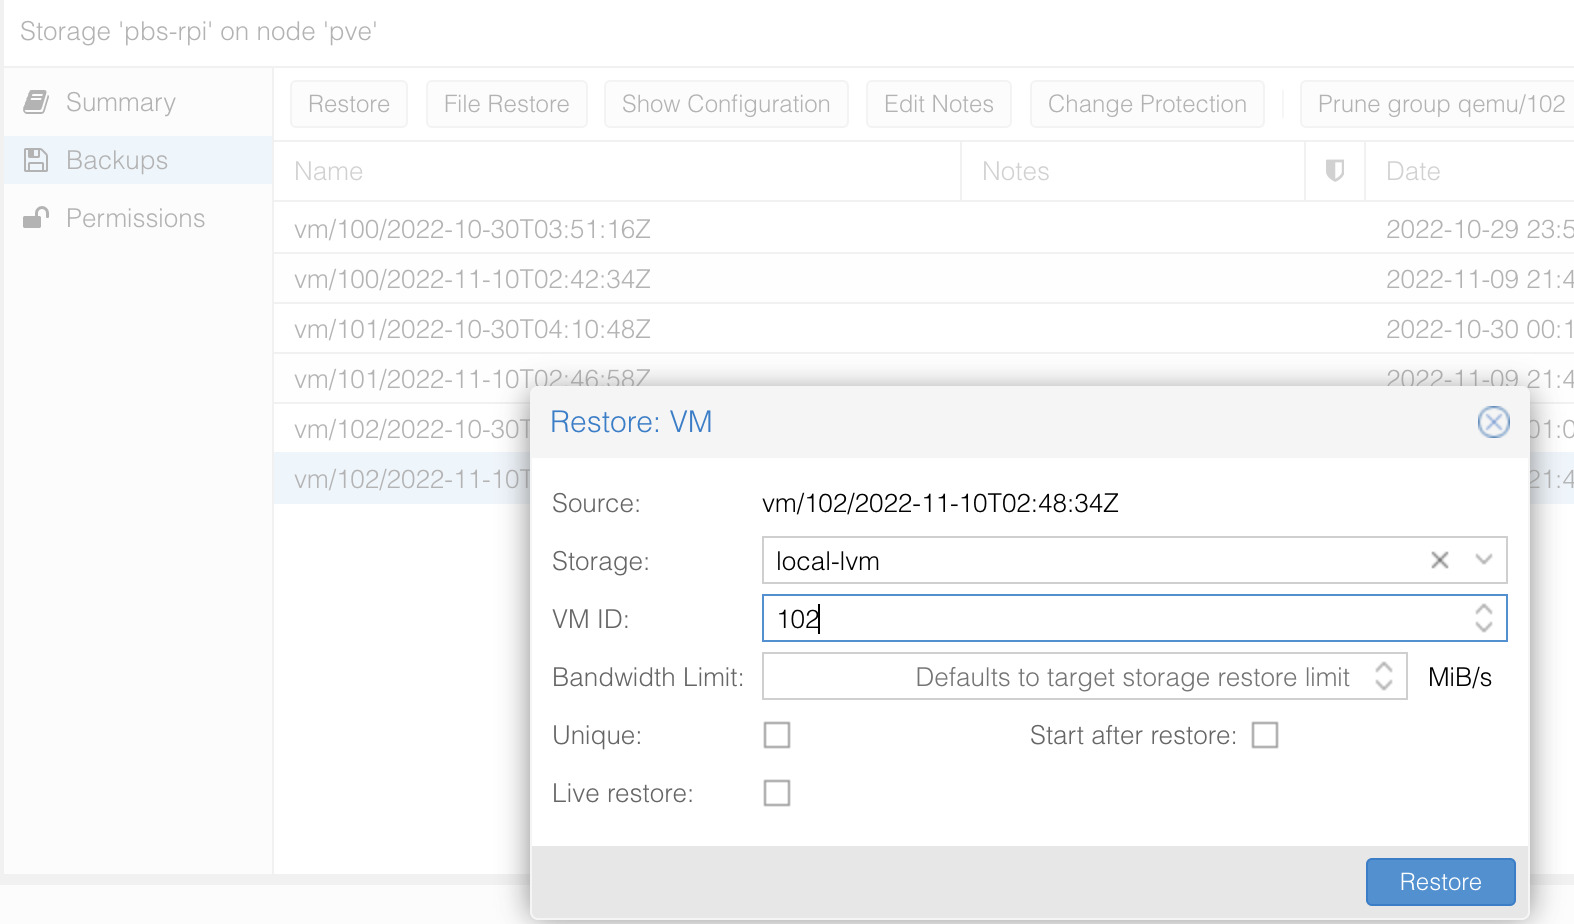
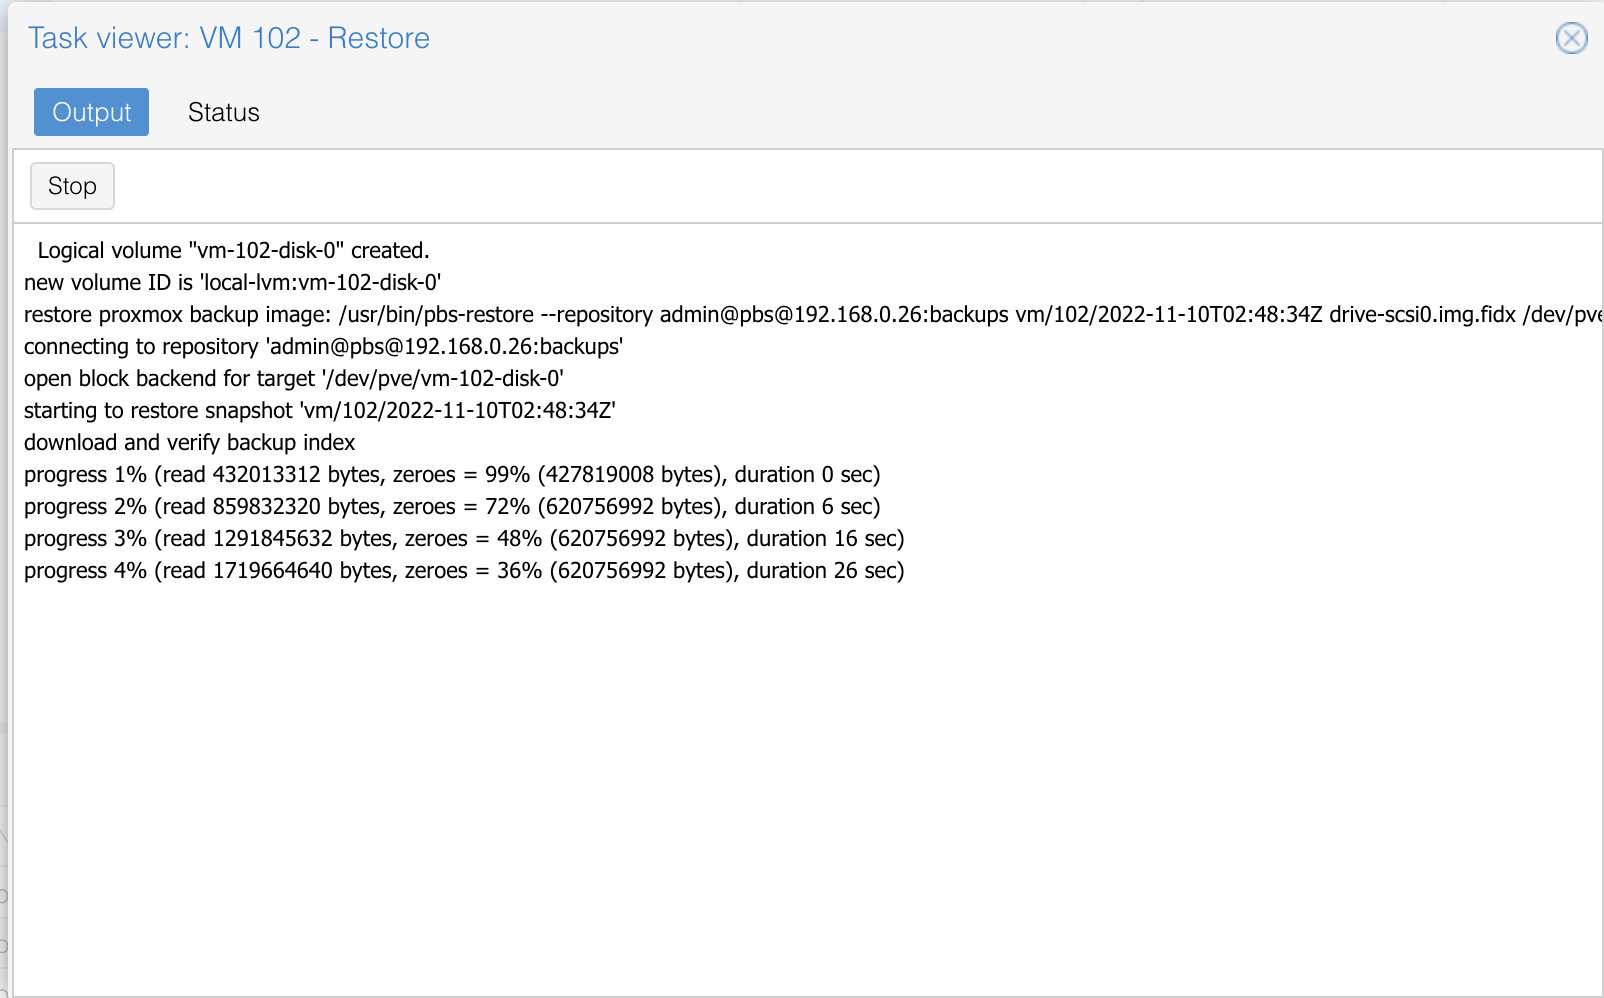
You are able to specify a few options such as the VM ID and storage option. Click Restore and a popup regarding the task status will appear. This will take a while so just hang back.
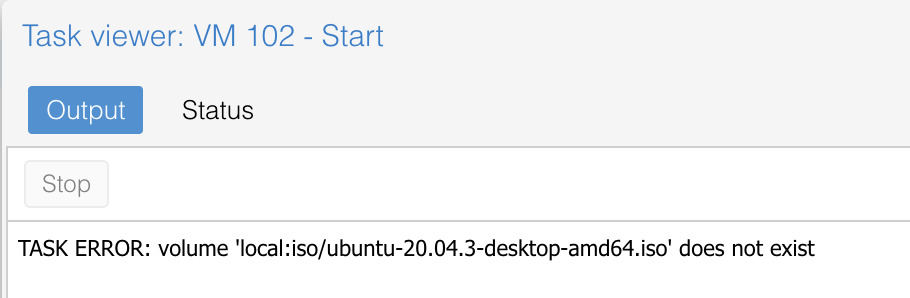
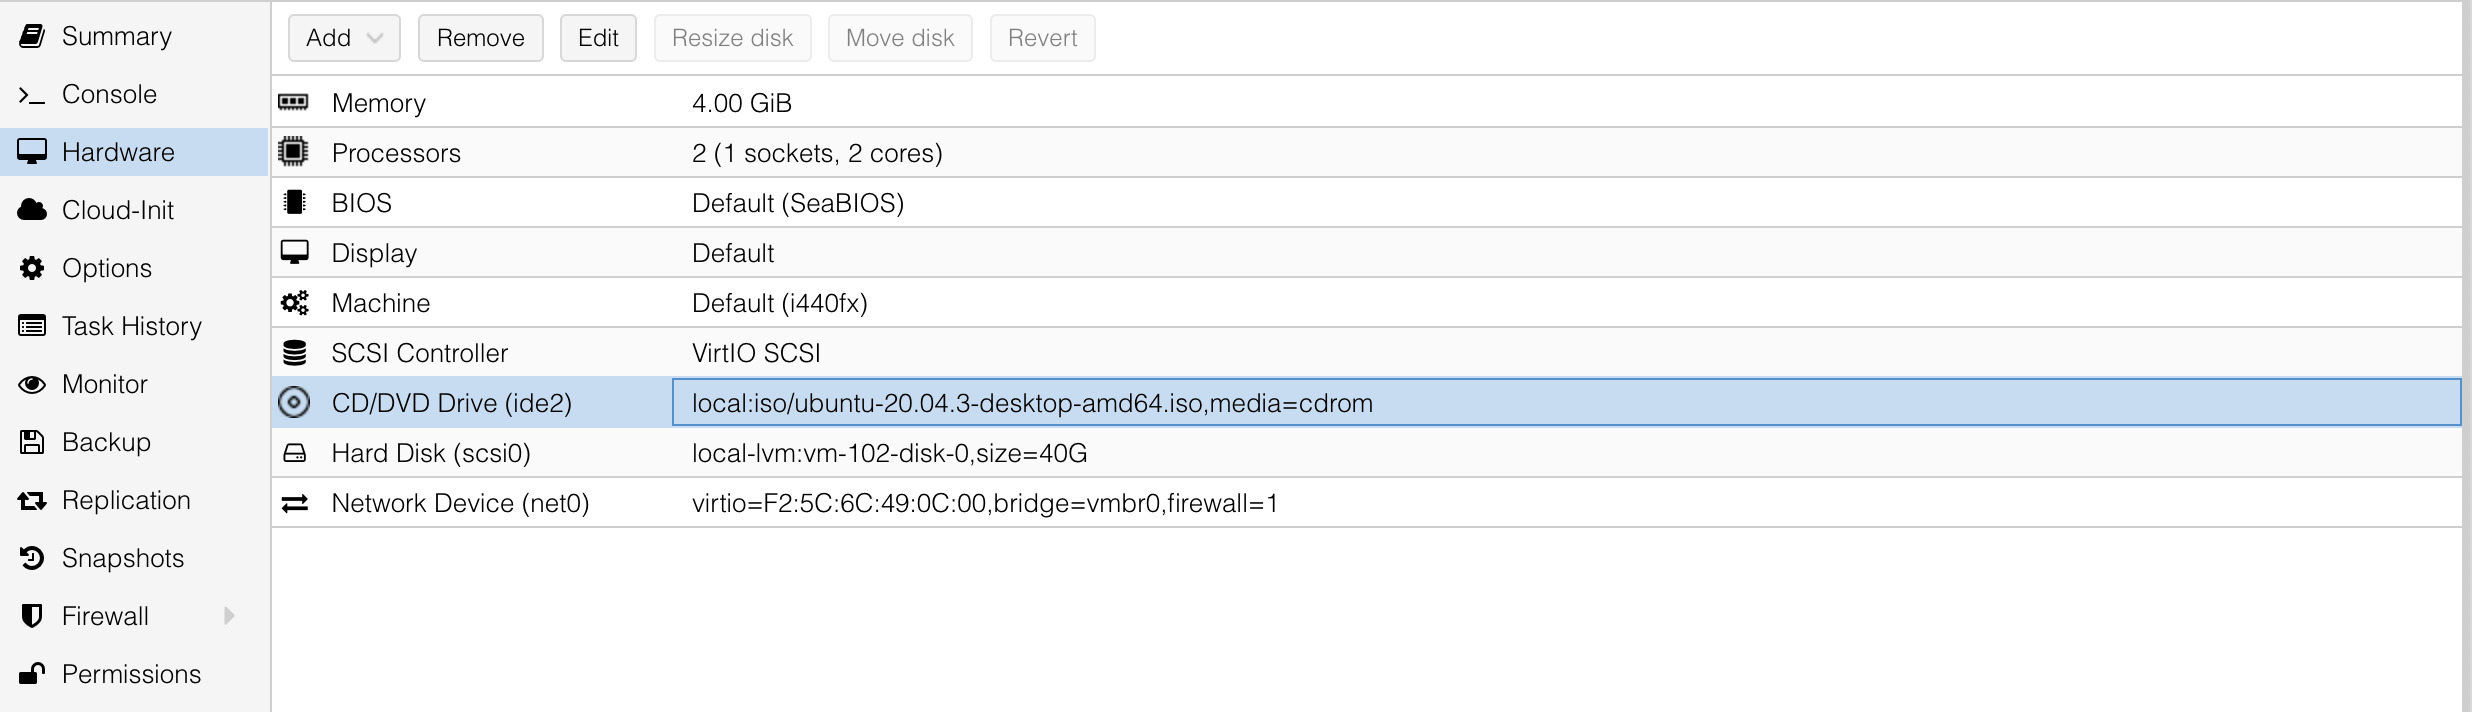
Once completed, I tried to start the VM but Proxmox complained that the CD/DVD attached file does not exist. When I built the VM, I never detached the ISO so Proxmox is killing the process as it is not able to find the file.
We can safely remove the CD/DVD Drive ISO and start the VM without fail!
Conclusion
Safely backing up your VM’s on a regular schedule to PBS is a convenient way to manage snapshots and instances across a single PVE node or even multiple. Backup them up to a Raspberry Pi is even more ideal as an incredibly portable device.
This blog post assumed that you have a Proxmox instance to connect and restore a VM. In future post(s), I will cover how to:
- Build a Proxmox server
- Disable the Enterprise Edition
- Build a VM on the PVE node
- Configure the VM to start on boot
- Enable a backup schedule for the VM
and more.